
🍬🍥 Fluffy Homemade Twinkies Copycat Recipe: Easy Snack 🍰✨
1. Introduction
Nothing awakens a cozy snack craving like a bite of a soft vanilla sponge filled with creamy sweetness. This twinkies copycat recipe recreates the iconic bite-sized treat at home with a fluffy cake and a silky filling. You’ll learn how to bake a thin sheet cake, slit it into rectangles, and swirl in a dreamy vanilla creme for that classic Twinkies vibe. It’s nostalgia you can taste, made with simple ingredients and hands-on care.
It’s the kind of recipe that feels almost magical: crackle-soft crust, tender crumb, and a cream center that stays perfectly inside the cake. Ready in about an hour, it’s a fun project for weekends, party snacks, or lunchbox treats. If you’ve been hunting for a true homemade twinkies recipe, you’re in the right kitchen.
2. Why You’ll Love This Recipe
- Ready in about 60 minutes — perfect for a quick sweet fix.
- Sheet-cake convenience keeps the process simple and repeatable.
- Customizable filling— vanilla cream, marshmallow, or a mix for the signature texture.
- Great for meal-prep: bake a batch, fill, and refrigerate for grab-and-go snacks.
3. Ingredient Notes
For a tender, airy sponge, choose ingredients that embrace a light, delicate crumb. Use cake flour when possible, or substitute with all-purpose flour plus a tablespoon of cornstarch per cup to mimic cake-like tenderness. Room-temperature eggs help the batter emulsify and trap air for a soft rise. A splash of vanilla extract heightens the sweetness without overpowering it, while a pinch of salt balances flavors.
The filling can swing between a classic butter-vanilla cream and a dreamy marshmallow fluff-based center. If you want a dairy-free option, swap in dairy-free butter and a coconut-cream-based filling with powdered sugar. I also love adding a tiny pinch of salt to the cream to mimic that bakery profile.
If you’re looking for more comforting snack ideas, you might enjoy our creamy chicken alfredo pizza — a quick, cozy treat that pairs nicely with a gentle sweet bake like this Twinkies copycat. For a grab-and-go breakfast, check our fluffy oatmeal crepes ideas.
4. Kitchen Tools You Need
Having the right tools makes this recipe feel effortless. A reliable mixer helps whip the filling to a luxurious, airy texture. A jelly-roll pan or rimmed baking sheet ensures an even, thin cake layer that’s easy to cut into rectangles. Parchment paper keeps the sponge from sticking and makes cleanup a breeze. Consider these handy picks to streamline the process:
- Compact 6-in-1 Digital Air Fryer by Amazon Basics — great for reheating leftovers with a gentle crisp.
- T-fal 14-Piece Hard Anodized Nonstick Cookware Set — durable pans for even baking and easy cleanup.
- KitchenAid Artisan 5-Quart Stand Mixer in Scorched Orange — a dream for whipping the filling to silky peaks.
- Ninja Foodi Smart XL Indoor Grill & Air Fryer Combo — versatile for side snacks or reheating treats with minimal effort.
- Ninja SLUSHi Pro RapidChill Drink Maker — optional gadget for quick cold fillings or beverages to pair with your sweets.
5. How to Make Fluffy Homemade Twinkies Copycat Recipe Easy Snack
Phase 1 — Make the sponge
Preheat your oven to 350°F (175°C). Line a jelly-roll pan with parchment paper and lightly grease. In a bowl, whisk dry ingredients (flour, a little cornstarch, baking powder, and salt) until evenly distributed.
In a separate bowl, beat eggs with sugar until light and pale. Mix in milk and vanilla. Fold the wet into the dry just until combined, then whisk in a little melted butter or neutral oil for moisture. The batter should be smooth and glossy.
Pour the batter into the prepared pan and bake until the edges pull away and a tester comes out clean, about 8–12 minutes depending on your oven. Let the cake cool briefly, then turn it onto a clean sheet of parchment. Peel away the pan liner and trim any uneven edges to create a neat rectangle.
Phase 2 — Bake and cut rectangles
Once the sponge is cool enough to handle, flip it onto a clean surface. While warm, use a ruler and a sharp knife to cut the cake into uniform rectangles that resemble Twinkie bars. Keep the cut pieces covered so they don’t dry out while you prepare the filling.
The goal is a thin, evenly baked sheet—think 1/4 inch thick—so the final snack feels light and delicate. If your edges brown a little, don’t worry; that caramelized aroma is part of the bakery flavor.
Phase 3 — Make the filling
In a mixer, beat softened butter with powdered sugar, a pinch of salt, and vanilla until pale and fluffy. If you prefer a marshmallow-like center, gently fold in a prepared marshmallow fluff or whip extra cream with a touch of sugar for a lighter bite. The goal is a smooth, pipeable cream that holds its shape.
Transfer the filling to a piping bag or a small spatula, and whip until it peaks softly. Taste and adjust sweetness if needed; a touch more vanilla can push the flavor toward that nostalgic profile.
Phase 4 — Assemble the Twinkies
Spread a generous line of filling along one edge of a cake rectangle, then top with another rectangle. Press gently to seal, so the cream is enclosed. Repeat with the remaining pieces. If you don’t want to roll, you can also pipe the filling along the center and fold the sides to create a sandwich cake square.
Dust with a little powdered sugar or serve as-is for a classic look. Store any leftovers in an airtight container in the fridge for up to 3–4 days.
6. Expert Tips for Success
- Chill the filling after whipping if you’ll be piping; it helps it hold shape better.
- Keep the sponge evenly thin; a thicker layer can overwhelm the cream and feel gummy.
- Room-temperature ingredients emulsify more smoothly, giving you a silkier filling.
- Don’t overbake the sponge or it will turn dry; pull it as soon as it springs back.
7. Variations & Substitutions
For a dairy-free version, swap in dairy-free butter and coconut cream-based filling. To reduce sugar, cut the filling sugar by a little and add a pinch of salt to balance sweetness. If you want a playful twist, swirl a small amount of marshmallow fluff into the cream for a striped, marshmallowy center. Gluten-free friends can use a 1-to-1 gluten-free flour blend that behaves like all-purpose.
Pair these with a hot drink or a fruit compote for contrast. If you’re in the mood for more comforting snacks, explore our peanut butter oat cups for another quick bite, or check the protein muffins for a little nourishing sweetness.
8. Storage & Reheating
Store Twinkies copycat snacks in an airtight container in the refrigerator for up to 3–4 days. If you’d like to reheat, a quick 5–8 second zap in the microwave keeps the center soft while restoring a touch of warmth. For a crisper edge, a short pass under a low-heat oven (about 250°F/120°C) can freshen the exterior without drying the cake.
9. FAQ
Q: What is the best filling for a Twinkies copycat recipe?
A: A light butter-vanilla cream is classic, but you can mix in a little marshmallow fluff to mimic the texture of the original center.
Q: Can I freeze these?
A: Yes. Freeze unfilled cake rectangles in a single layer, then wrap with plastic and store in a bag. Thaw, fill, and assemble for best texture.
Q: How do I prevent the sponge from cracking when rolling?
A: Bake for a shorter time to keep it flexible, trim uneven edges, and work slowly when rolling to avoid tearing the surface.
Q: Do I need any special equipment?
A: Not really. A sheet pan, parchment, mixer, and a knife will suffice. The specialized tools listed above can make the process easier, but they’re not required.
10. Conclusion
With a light, vanilla sponge and a silky cream, this Fluffy Homemade Twinkies Copycat Recipe brings bakery nostalgia into your kitchen. Each bite delivers a tender crumb, a creamy center, and a smile-worthy sweetness that’s easy to share. Enjoy the process, then share the result with friends and family—because good snacks deserve to be celebrated.
Print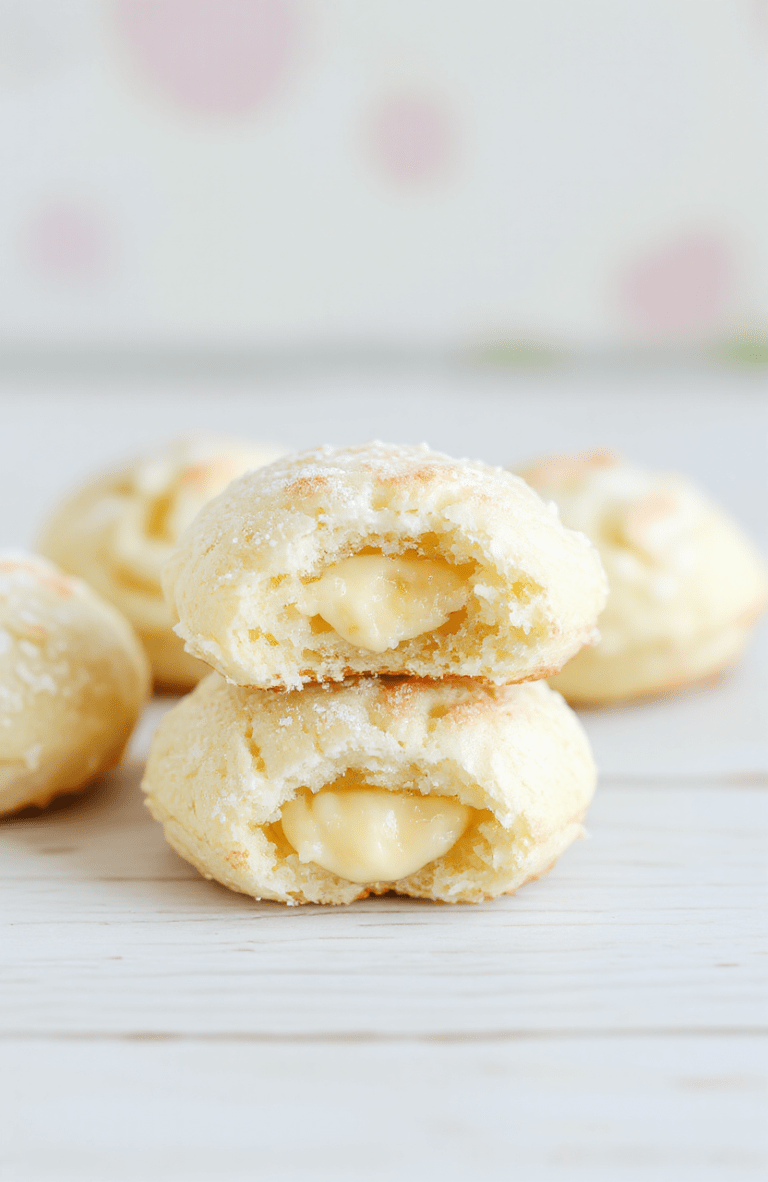
Fluffy Homemade Twinkies Copycat Recipe Easy Snack
A light vanilla sponge cake filled with a creamy center, baked as finger-sized bars and assembled into classic Twinkie-style treats.
- Total Time: 32 mins
- Yield: 12 bars 1x
Ingredients
- 1 cup all-purpose flour
- 1/2 cup granulated sugar
- 2 large eggs
- 1/3 cup milk
- 2 tablespoons vegetable oil
- 1 teaspoon vanilla extract
- 1 teaspoon baking powder
- 1/4 teaspoon salt
- 1/2 cup unsalted butter, softened
- 1 cup powdered sugar
- 2–3 tablespoons milk
- 1/2 teaspoon vanilla extract
Instructions
- Preheat oven to 350F. Line a 9×13 inch pan with parchment.
- Whisk flour, sugar, baking powder and salt in a bowl. In another bowl whisk eggs, milk, oil and vanilla. Combine the wet and dry ingredients until smooth. Spread evenly in the pan.
- Bake 12-14 minutes until a toothpick comes out clean. Let the cake cool completely.
- Cut into 12 slender rectangles (about 4×1 inch). Pipe or spread a line of cream filling on one side and place another rectangle on top to create a sandwich. Dust with powdered sugar.
Notes
- Tip: For a lighter texture, whisk eggs well or whip whites separately and fold in.
- Storage: Refrigerate filled Twinkies 2 days for best texture.
- Make ahead: Bake sponge a day ahead and fill just before serving.
- Prep Time: 20 mins
- Cook Time: 12 mins
- Method: Baking
- Cuisine: American
- Diet: Vegetarian
Nutrition
- Serving Size: 1 Twinkie
- Calories: 150 Kcal
- Sugar: 18 g
- Sodium: 120 mg
- Fat: 6 g
- Saturated Fat: 3 g
- Unsaturated Fat: 2 g
- Trans Fat: 0 g
- Carbohydrates: 21 g
- Fiber: 0 g
- Protein: 3 g
- Cholesterol: 20 mg
