🍰 Japanese Milk Sandwich Cake: Ultra-Fluffy Tamago Sando That Melts in Your Mouth
1. Introduction
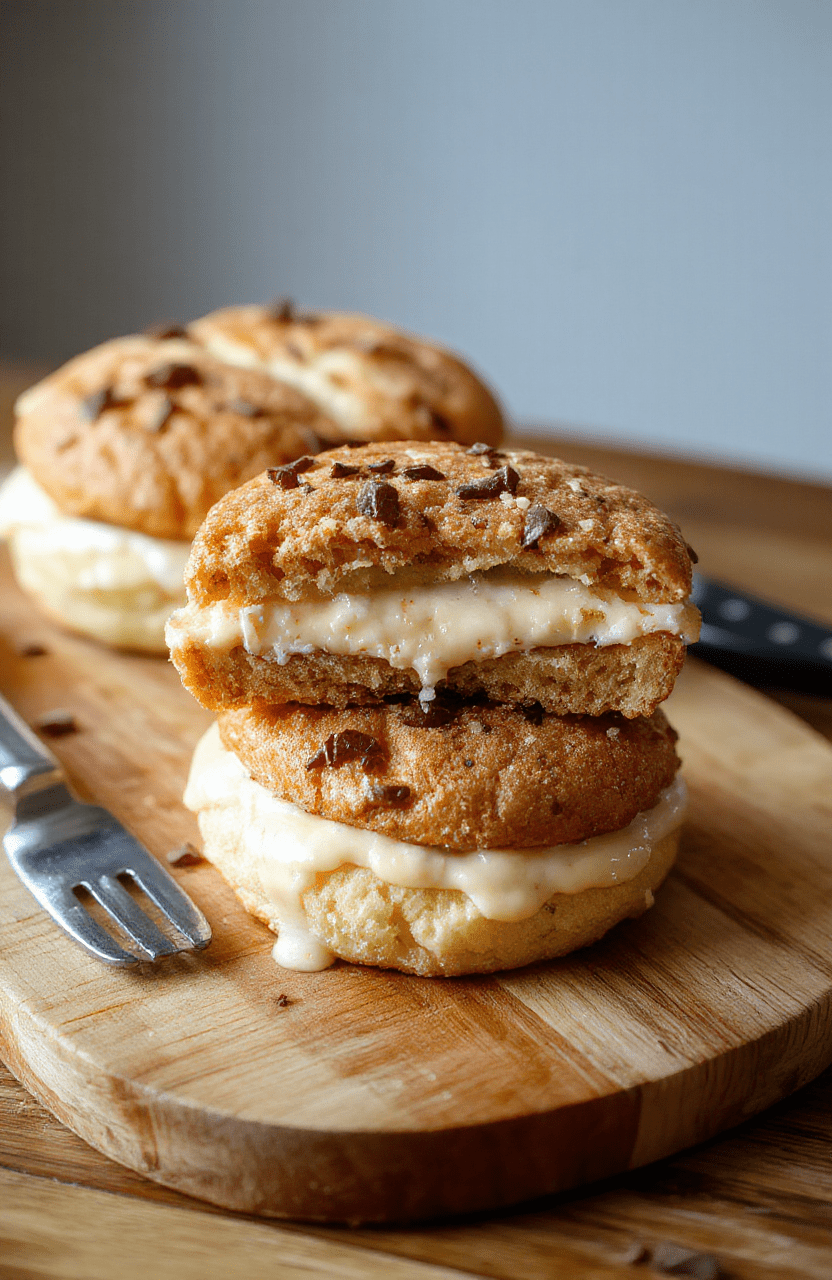
Imagine biting into a cloud—soft, slightly sweet, delicately eggy, and impossibly tender. That’s the magic of Japanese egg sandwich, affectionately called tamago sando in Japan. But this isn’t your average lunchbox staple. This Japanese Milk Sandwich Cake is a hybrid of a classic egg salad sandwich and a genoise cake: layered, cake-like bread filled with creamy, luxurious egg custard, baked in a loaf pan for uniform softness and structure. The result? A stunning, sliceable centerpiece that’s both nostalgic and modern—perfect for weekend brunch, baby showers, or as a gift for anyone who adores delicate, comforting flavors. Think ikura egg sandwich elegance, but in a family-friendly, no-fuss package.
2. Why You’ll Love This Recipe
- Ready in under 45 minutes active time—no fancy techniques, just smart mixing and baking.
- One-bowl, one-pan wonder: Minimal cleanup, maximum payoff.
- Texture dreams: The crumb is airy like a angel food cake, yet dense enough to hold its shape when sliced.
- Customizable filling: Love salmon roe? Add a dollop of ikura. Prefer savory? Boost umami with a pinch of kombu dashi in the custard.
- Kids & guests go wild: It’s visually stunning, subtly sweet, and full of protein-rich eggs—the ultimate crowd-pleaser.
3. Ingredient Notes
Every element here is chosen for its role in building that fluffy tamago sando texture—airy, moist, and deeplyegg-forward. Don’t skip the small details!
- All-purpose flour + cake flour blend: Cake flour gives bounce and tenderness; all-purpose adds just enough structure. (If you only have all-purpose, replace 2 tbsp per cup with cornstarch.)
- Eggs—room temperature: Cold eggs don’t aerate well. Whisking them with sugar over a double boiler (see Method) creates a stable, glossy sponge base—the secret to the height and silkiness.
- Whole milk + a splash of cream: Full-fat dairy ensures richness without weighing down the crumb. Avoid skim milk—it dries out the cake.
- Unsalted butter, melted & cooled: Adds moisture and tenderness. Neutral-tasting oils work in a pinch, but butter delivers that *luxurious mouthfeel*.
- Sugar: Not just sweetener—sugar helps retain moisture and stabilizes the egg foam. Use fine granulated for quicker dissolution.
- Vanilla extract: Opt for real bean extract for specks of floral aroma; it complements the eggs beautifully.
4. Kitchen Tools You Need
Saving your best sando for best tools—the right gear makes all the difference in achieving that signature delicate crumb and uniform bake.
KitchenAid Artisan 5-Quart Stand Mixer in Scorched Orange is a game-changer for whisking eggs and sugar to triple volume without tiring your arms—plus, it doubles as your bread, cake, and pastry machine. For a lighter, more compact option, the KitchenAid Classic Iconic Stand Mixer delivers identical performance in a retro-fabulous design.
Ninja Smart Double Oven with FlexDoor Technology ensures even heat distribution and precise temperature control—critical for egg-based batters, which can brown too fast or collapse under uneven heat. Pair it with a Compact 6-in-1 Digital Air Fryer by Amazon Basics for perfect brioche-style buns if you want to double down and toast the crust lightly.
Deluxe 33-Piece Silicone Utensil Set keeps your workspace safe and scratch-free—especially important when folding delicate batters. And for storage, the JoyJolt Airtight Glass Food Storage Set keeps leftover slices fresh for 2+ days without sogginess.
Pro tip: Line your loaf pan with parchment—don’t skip it. It ensures perfect release and clean edges. (A nonstick pan helps too—see the T-fal 14-Piece Hard Anodized Nonstick Cookware Set for a durable, lifetime-tested option.)
5. How to Make Japanese Milk Sandwich Cake
Think of this as building a golden, airy castle—one layer at a time. The structure of egg-sponge cake means each step matters. Let’s go:
Phase 1: Warm the eggs & sugar (Key for volume!)
In a heatproof bowl, whisk together 4 large eggs and ¾ cup sugar over a double boiler (or bowl over simmering water—don’t let the water touch the bowl). Whisk continuously for 5–7 minutes until the mixture is pale, thick, and forms a ribbon when you lift the whisk. It should read ~110°F on a thermometer—warm, not hot. This step denatures the egg proteins gently, letting them trap more air and creating that signature sponge texture.
Phase 2: Fold in dry ingredients
In a separate bowl, sift together 1 cup cake flour, ¼ cup all-purpose flour, and ¼ tsp salt. Add ¼ tsp vanilla extract. Gradually fold into the egg mixture in 3 additions using a silicone spatula (cut, fold, turn). Stop when just combined—overmixing = dense cake. You want a ribbon that holds its shape for 10 seconds before sinking back in.
Phase 3: Incorporate wet fats
Melt ½ cup unsalted butter and let cool to warm (not hot). Drizzle 2 tbsp into the batter while gently folding—this pre-emulsifies the fat and prevents separation. Then, add milk (½ cup whole milk + 2 tbsp heavy cream), whisked together, and fold in. Finally, fold in the remaining butter.
Phase 4: Bake like a pro
Pour into a greased and parchment-lined 9×5-inch loaf pan—fill to ¾ full. Tap the pan twice on the counter to release large air bubbles. Bake at 350°F (175°C) for 35–40 minutes, until golden and a toothpick comes out clean. The top should spring back when touched—no sinkage!
Phase 5: Cool & fill
Let cool in the pan for 15 minutes, then invert onto a wire rack. Cool completely before slicing horizontally into 3 layers.
For the filling: Whip 1 cup heavy cream + 2 tbsp powdered sugar + 1 tsp vanilla to stiff peaks. Fold in 2 hard-boiled, finely mashed eggs. Season with a pinch of sea salt. Spread between layers and on top. Chill 30 minutes before slicing—it sets beautifully.6. Expert Tips for Success
- No cold ingredients: Cold milk or butter can deflate the batter. Let everything come to room temp.
- Don’t overbake: Egg batters dry out fast. Start checking 5 minutes early—it’s better underbaked (and rest firm) than overbaked.
- Use cake flour: All-purpose alone = rubbery texture. Cake flour’s low protein = delicate crumb.
- Chill before slicing: Warm custard fills smear. A firm cake yields sharp, pretty layers.
- Add-ins? Keep them small: A tablespoon of finely chopped chives or nori adds umami—but don’t exceed 1 tbsp, or they disrupt structure.
7. Variations & Substitutions
- Vegan version: Use flax eggs (3 tbsp ground flax + 9 tbsp water = 3 “eggs”), oat milk + coconut cream, and swap sugar for coconut sugar (reduce by 1 tbsp).
- Gluten-free: Substitute the flour blend with a 1:1 GF flour + ½ tsp xanthan gum. Note: texture will be denser—expect a *moist cake* over *spongy sandwich*.
- Ikura egg sandwich style: Replace 2 tbsp of the custard filling with a thin layer of miso-marinated salmon roe. Top with fresh dill and microgreens.
- Savory twist: Add 1 tbsp furikake to the batter + top with toasted sesame seeds before baking.
- Flavor boost: Infuse warm milk with a 2-inch piece of kelp (kombu) for 10 minutes, then strain—adds oceanic depth essential for authentic tamago sando flavor.
8. Storage & Reheating
Refrigerator: Store covered in an airtight container for up to 4 days. The cake improves on day 2—flavors meld, custard sets further.
Freezer: Wrap unfilled loaf tightly in plastic + foil. Freeze up to 1 month. Thaw overnight in fridge, then fill and serve.
Reheating: Not recommended for full assembled sando—custard can separate. Instead, toast *plain slices* in a 300°F oven for 8–10 minutes for a warm, tender bite. Add filling fresh.
9. FAQ
Can I make this without a double boiler?
Yes—but you risk scrambling eggs. Use a microwave: heat eggs + sugar in 20-second intervals, whisking in between, until warm (not hot) and doubled in volume (~2 minutes total). Not ideal, but workable.
Why did my cake sink in the middle?
Mostly underbaking or over-folding. Egg batters rely on structure built at bake time. Also, opening the oven door too early can cause collapse. Be patient—don’t peek before 30 minutes!
Can I use this for a layered cake instead of a sandwich?
Absolutely! Bake in two 8-inch round pans at 325°F for 22–25 minutes. Fill with whipped cream and fresh berries for a delicate Japanese-inspired dessert.
Is this the same as Spanish egg cake (Tarta de Santiago)?
No—while both use only eggs, sugar, and almonds/flour, Japanese egg sandwich cake is leavened by whipped eggs (not baking powder), dairy-rich, and built for softness—not crunch. It’s a hybrid: part tamago sando, part génoise.
10. Conclusion
There’s something undeniably joyful about slicing into a Japanese egg sandwich that looks like dessert but tastes like comfort food perfected. With its velvety crumb, egg-forward richness, and delicate sweetness, this fluffy tamago sando is more than a recipe—it’s an experience. Whether you top it with ikura, keep it classic, or share it at a baby shower, it’s guaranteed to impress. Ready to bring warmth, elegance, and that melt-in-your-mouth magic to your table? Now *that’s* Japanese bakery-tier happiness. 🥚✨
Print
Japanese Milk Sandwich Cake
A viral Japanese-style egg sandwich cake with layered milk bread and creamy tamago salad, chilled and sliced like a cake for a whimsical, photogenic lunch.
- Total Time: 25 minutes
- Yield: 6 servings 1x
Ingredients
- 6 slices Japanese milk bread (khirishima)
- 4 large eggs
- 2 tbsp mayonnaise
- 1 tbsp mirin
- 1 tsp sugar
- 1/4 tsp salt
- 1/8 tsp white pepper
- 1 tbsp unsalted butter, for toaster
- Sesame seeds and microgreens, for garnish (optional)
Instructions
- Make tamago: Whisk eggs, mayonnaise, mirin, sugar, salt, and pepper until smooth. Strain into a nonstick pan over low heat. Cook slowly, stirring constantly with a silicone spatula, until just set but still moist—about 5–6 minutes. Spread on a tray, cool, then refrigerate 10 mins.
- Butter one side of each milk bread slice lightly and toast in a pan until golden. Let cool.
- Layer tamago and bread: start with bread, spread tamago, top with bread, repeat, pressing gently after each layer (aim for 4–6 alternating layers).
- Wrap tightly in parchment or plastic wrap, refrigerate at least 1 hour (or up to 24 hours).
- Unwrap, slice into 1-inch rounds like a cake. Garnish with sesame seeds and microgreens before serving.
Notes
- For authentic flavor, use Japanese mayonnaise (Kewpie) and mirin.
- Cooking tamago low and slow is key to its signature custardy texture.
- Optional: brush bread with butter and toast both sides for extra crispness.
- Prep Time: 10 minutes
- Cook Time: 10 minutes
- Method: Stovetop and chilling
- Cuisine: Japanese
- Diet: Vegetarian
Nutrition
- Serving Size: 1 slice (cake round)
- Calories: 210 Kcal
- Sugar: 4g
- Sodium: 220mg
- Fat: 11g
- Saturated Fat: 4g
- Unsaturated Fat: 6g
- Trans Fat: 0g
- Carbohydrates: 22g
- Fiber: 1g
- Protein: 7g
- Cholesterol: 125mg
