
Sourdough Bread Guide: Tips, FAQs & Non-Bread Ideas 🍞✨🥖
1. Introduction: Unlocking the Magic of Sourdough

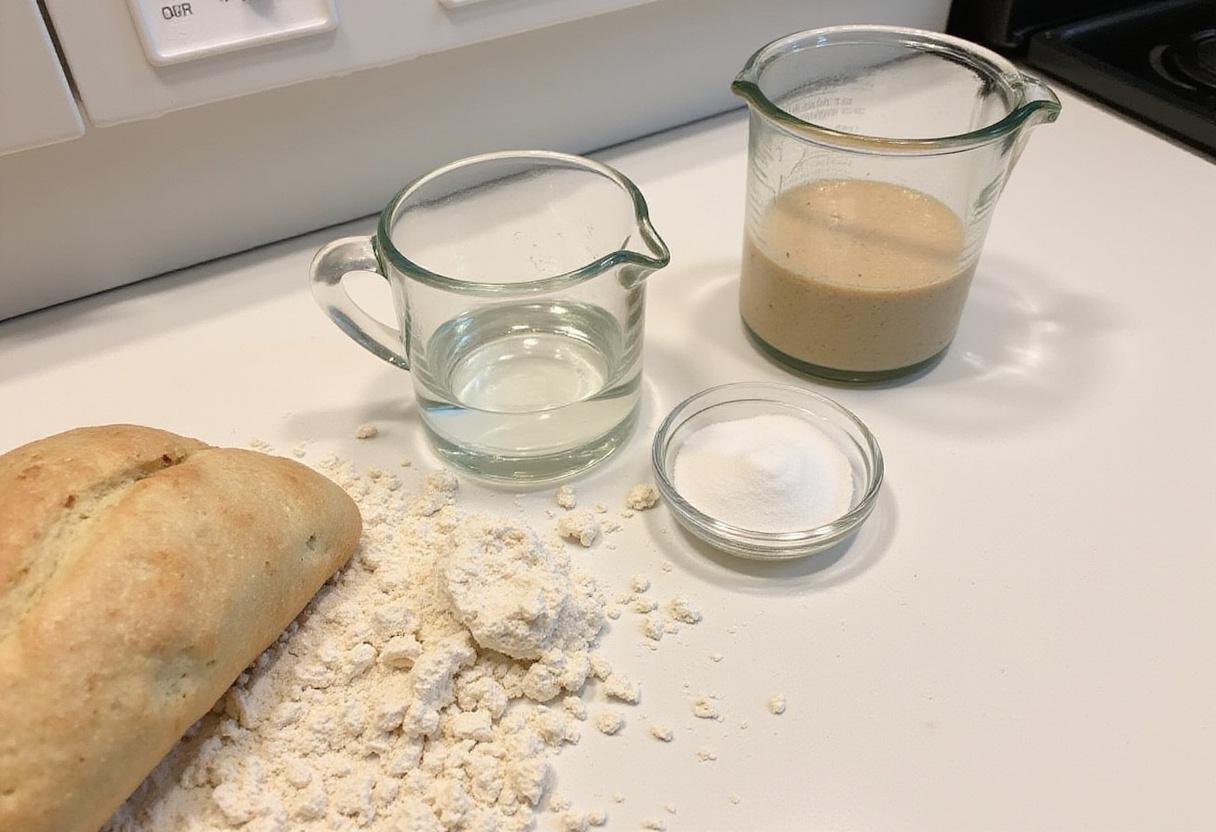
2. Ingredients Needed for the Perfect Sourdough Loaf
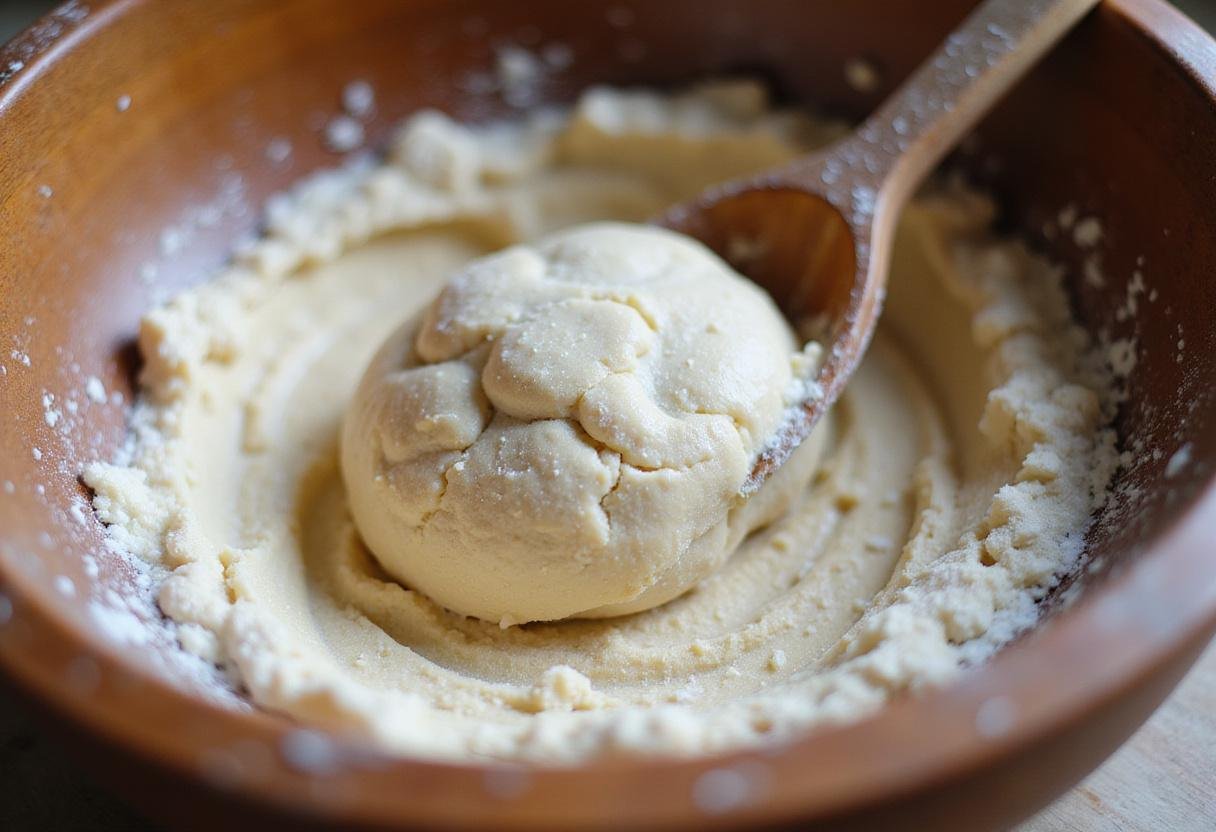
3. Step 1: Mix Your Ingredients – The Autolyse Stage
Combine the flour and water in a large bowl. Stir until a shaggy dough forms. Let this mixture rest for 30-60 minutes before adding the starter and salt. This initial mixing, known as the autolyse, is crucial, as it begins the gluten development and creates a better bread structure.4. Step 2: Knead the Dough – Developing Strength
5. Step 3: First Proofing – Bulk Fermentation

6. Step 4: Shaping and Scoring – The Final Touches
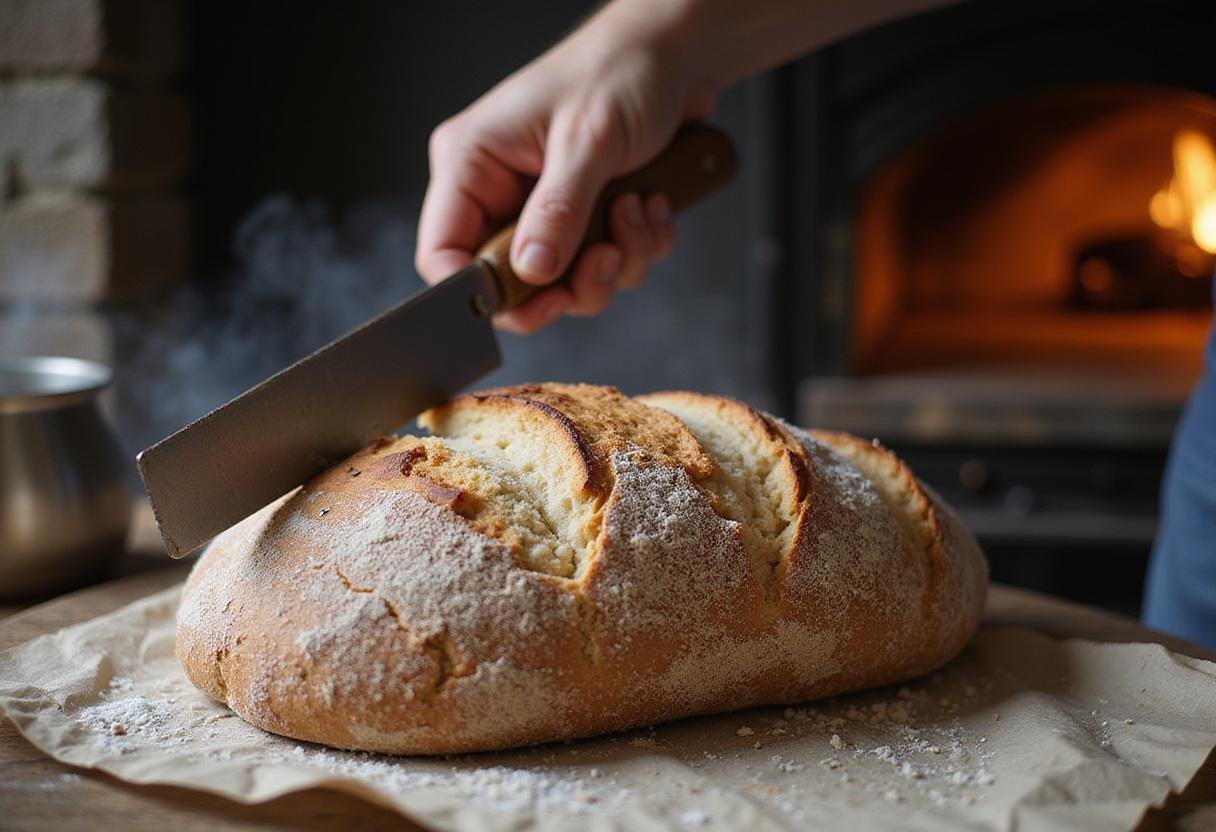
7. Baking Your Sourdough Bread – Achieving the Perfect Crust
Preheat your oven to 450°F (232°C) with a Dutch oven inside. Once hot, carefully place your loaf in the Dutch oven with steam—this can be achieved by leaving the lid on for the first 20 minutes of baking. Bake for 30-35 minutes with the lid on, then remove the lid and bake for another 15-20 minutes, or until the crust is golden brown and the bread sounds hollow when tapped on the bottom.8. How Long Does Sourdough Bread Last? – Storage Tips
So, how long does sourdough bread last? Sourdough bread typically lasts about 4-5 days at room temperature when stored in a bread box or paper bag. The natural preservatives in sourdough, thanks to the lactic acid bacteria, help extend its shelf life compared to commercial bread. You can also freeze sourdough bread for up to 3 months without significant loss of quality. Make sure to slice the bread before freezing for easier use. Consider also trying our Simple Creamy Chicken and Spinach Casserole Recipe for a comforting meal.9. Non-Bread Ideas Using Sourdough Starter – Waste Not, Want Not!
Sourdough isn’t just for bread! Don’t throw away that sourdough discard! You can use your sourdough starter (discard) to make: – Pancakes: Tangy sourdough pancakes are a breakfast delight. – Waffles: Crispy on the outside, chewy on the inside – perfect. – Crackers: A great way to use up discard; add herbs and spices for extra flavor. – Pizza dough: Sourdough pizza crust has incredible flavor and texture. Explore the world of sourdough beyond bread and elevate your culinary adventures! While you have your starter out, why not bake some of our Ruth’s Chris Stuffed Chicken Copycat Recipe for dinner?10. FAQs – Your Sourdough Questions Answered
Here are some frequently asked questions:Can dogs eat sourdough bread? While small amounts of plain sourdough bread are usually safe for dogs, avoid adding any ingredients like garlic or raisins which can be harmful. It’s always best to consult with your veterinarian before feeding your dog any new foods.Sourdough bread in Spanish? Sourdough bread is referred to as “pan de masa madre” in Spanish. If you’re looking for the recipe in Spanish, search for “receta de pan de masa madre.”Sourdough bread and cancer? Recent studies suggest that sourdough may have benefits over commercial bread due to its lower glycemic index and better digestibility , but consult a healthcare professional for personal advice. Sourdough’s fermentation process can also break down phytic acid, improving nutrient absorption.11. Conclusion – Embrace the Sourdough Journey
In conclusion, mastering the art of sourdough bread is a rewarding journey that offers delicious results and health benefits. With the tips and tricks shared in this guide, you’re on your way to becoming a sourdough pro! Remember to experiment, be patient, and most importantly, have fun. From understanding “how long does sourdough bread last” to exploring creative sourdough recipes not bread like our Simple One-Pot Queso Chicken and Rice Recipe, enjoy every moment of your sourdough adventure! And who knows, maybe you will learn how to score sourdough bread to create the most beautiful loaf ever! Print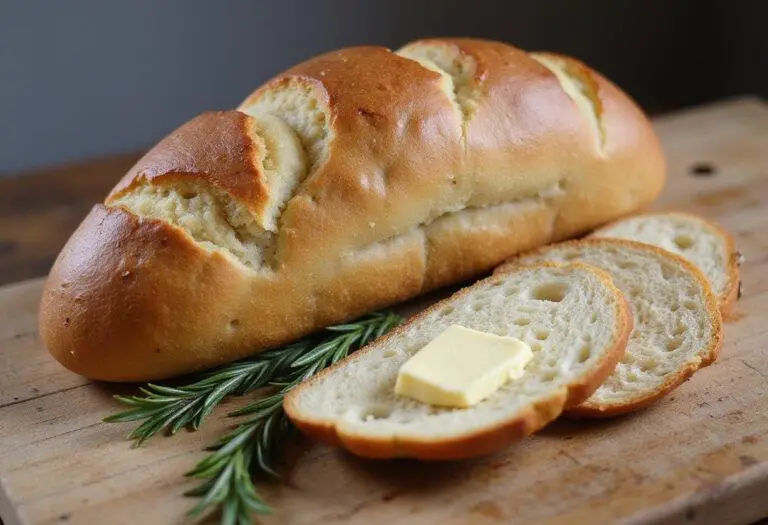
Sourdough Bread Guide: Tips, FAQs & Non-Bread Ideas
Dive into the world of sourdough bread with this comprehensive guide, featuring essential tips, FAQs, and creative non-bread ideas! Master the art of making sourdough with our step-by-step instructions for a deliciously crusty loaf.
- Total Time: 4 hours 50 minutes
- Yield: 1 loaf
Ingredients
Scale
- 500g of all-purpose flour
- 350g of lukewarm water
- 100g of active sourdough starter
- 10g of sea salt
Instructions
- Combine the flour, water, and sourdough starter in a large bowl until a shaggy dough forms.
- Turn the dough onto a floured surface and knead for 10-15 minutes until smooth and elastic.
- Place the dough in a lightly oiled bowl, cover with a damp towel, and let proof for 4-6 hours or until doubled in size.
- Gently turn the dough onto a floured surface, shape into a round loaf, and let rest for another hour.
- Score the surface of the dough with a sharp knife just before baking.
- Preheat the oven to 450°F (232°C), adding steam by placing a tray with water below.
- Bake for 30-35 minutes until golden brown and hollow sounding when tapped.
Notes
- Sourdough bread lasts 4-5 days at room temperature.
- Freeze sourdough bread for up to 3 months.
- Slice bread before freezing for easier use.
- Prep Time: 15 minutes
- Cook Time: 35 minutes
- Category: Bread
- Method: Baking
- Cuisine: International
- Diet: Vegetarian
Nutrition
- Serving Size: 1 slice
- Calories: 150 Kcal
- Sugar: 0.4g
- Sodium: 200mg
- Fat: 0.5g
- Saturated Fat: 0.1g
- Unsaturated Fat: 0.4g
- Trans Fat: 0g
- Carbohydrates: 30g
- Fiber: 2g
- Protein: 5g
- Cholesterol: 0mg

1 thought on “Sourdough Bread Guide: Tips, FAQs & Non-Bread Ideas”