
© Original recipe by Serena Miller ©
🧀🌺 Mini Grilled Cheese Hawaiian Rolls: The Perfect Cheesy Snack! 🍍🔥
1. Introduction
If you’re searching for easy appetizer recipes that are quick to prepare and irresistibly cheesy, this Mini Grilled Cheese Hawaiian Rolls recipe is your new go-to. Combining the sweet, tender flavor of Hawaiian rolls with gooey melted cheese and crispy edges, these bites are perfect for any occasion. Whether it’s a casual snack or a crowd-pleasing appetizer, these cheesy treats will impress everyone at your table.
2. Why You’ll Love This Recipe
- Ready in 20 minutes—perfect for busy weeknights or spontaneous gatherings.
- One-pan or one-skillet preparation, making cleanup a breeze.
- Customizable toppings and fillings to suit every taste.
- Deliciously cheesy and crispy, with the irresistible aroma of toasted bread.
- Great for quick lunch ideas or snacks that everyone loves.
3. Ingredient Notes
Choosing the right ingredients enhances the flavor and texture of these cheesy Hawaiian rolls. Use high-quality Hawaiian rolls—they’re sweet, soft, and perfect for absorbing flavors. For the cheese, opt for a melty mozzarella or cheddar, which creates that satisfying stretch. Add slices of ham, cooked bacon, or even a sprinkle of chopped green onions for extra flavor. The butter and garlic ensure a golden, crispy coating—use fresh garlic or garlic powder based on your preference.
4. Kitchen Tools You Need
To perfect these mini grilled cheese bites, a few handy tools can make the process easier. The Ninja Foodi Smart XL Indoor Grill & Air Fryer is fantastic for achieving that crispy exterior without deep-frying. A good nonstick skillet will help you cook evenly and prevent sticking. For slicing and assembling, a sharp Chef’s knife and a rotating pizza oven will come in handy for quick, uniform heating.
5. How to Make Mini Grilled Cheese Hawaiian Rolls
Preparation of Ingredients
Start by slicing your Hawaiian rolls in half horizontally. Lay them cut-side-up on a clean work surface. Spread a thin layer of butter mixed with minced garlic over each cut side—this gives the bread an aromatic, golden crust. Place slices of cheese on the bottom halves, topping with your chosen fillings like ham or bacon if desired.
Grilling Process
Heat your skillet or indoor grill over medium heat. Once hot, place the assembled rolls cut-side-down. Grill until the cheese melts and the bread turns crispy and golden—about 3-4 minutes. Keep an eye on them to avoid burning! For a more even toast, cover the skillet with a lid or use an air fryer to finish cooking and crisping.
Assembly & Serving
Once grilled to perfection, slice each roll in half if desired, and serve immediately while cheesy and warm. The result is a perfect bite-sized snack with a crispy exterior and gooey center, bursting with savory flavors.
6. Expert Tips for Success
- Make sure your pan or grill is well-heated before adding the rolls for an even golden crust.
- Use shredded cheese if you prefer a meltier consistency and easier coverage.
- For extra flavor, brush the rolls with a butter-garlic mixture and sprinkle with parmesan cheese before grilling.
- Don’t overload the rolls with fillings—they should be balanced to prevent spillage and ensure thorough melting.
7. Variations & Substitutions
This recipe is highly adaptable. Swap the ham for cooked chicken or turkey slices. For a vegetarian version, add sautéed peppers or mushrooms. If you’re dairy-free, use vegan cheese alternatives. Whole wheat or gluten-free Hawaiian rolls are excellent options for specific dietary preferences, available at your local grocery store or specialty shops.
8. Storage & Reheating
Leftovers can be stored in an airtight container in the fridge for up to 2 days. To reheat, place them in a hot skillet or use your air fryer at 350°F for 3-4 minutes until crispy and heated through. Avoid microwaving, as it can make the bread soggy and cheese harden.
9. FAQ
Can I make these ahead of time?
Yes, assemble the rolls and refrigerate them covered. Grill or bake just before serving for the best fresh-out-of-the-oven texture.
What cheese works best?
Mozzarella provides the classic stretch, but cheddar, Monterey Jack, or a blend creates richer flavors. Choose cheeses that melt well for optimal gooeyness.
Can I bake these instead of grilling?
Absolutely! Place assembled rolls on a baking sheet and bake at 375°F for about 10 minutes, or until cheese bubbles and bread is crisp.
10. Conclusion
These Mini Grilled Cheese Hawaiian Rolls are a delightful, cheesy snack that’s easy to make and always a crowd-pleaser. Whether used as quick lunch ideas or a party appetizer, they deliver on flavor and fun. Gather your ingredients and enjoy creating these irresistibly cheesy bites today!
Print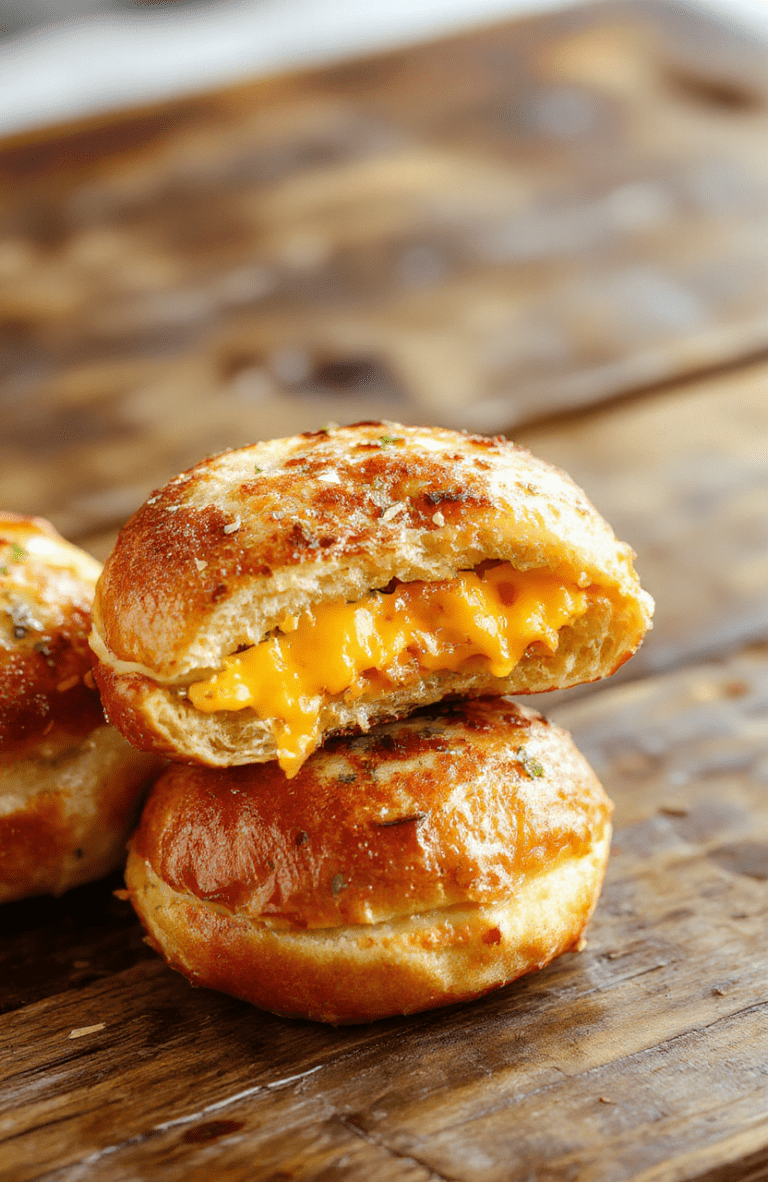
Mini Grilled Cheese Hawaiian Rolls
Quick and easy mini grilled cheese sandwiches made with soft Hawaiian rolls and melty cheese, perfect for appetizers or a quick lunch.
- Total Time: 15 minutes
- Yield: 12 mini sandwiches 1x
Ingredients
- 12 Hawaiian rolls
- 2 cups shredded cheddar cheese
- 4 tbsp butter, melted
- 1 tsp garlic powder (optional)
- Fresh herbs for garnish (optional)
Instructions
- Preheat a skillet over medium heat.
- Slice the Hawaiian rolls in half horizontally.
- Spread melted butter on cut sides of each roll.
- Place the bottom halves of rolls in the skillet, cheese on top, then cover with the top halves.
- Cook until the cheese is melted and the bread is golden brown, about 3-4 minutes per side.
- Garnish with fresh herbs if desired and serve warm.
Notes
- Feel free to add bacon, ham, or other toppings for variation.
- Use different cheeses like mozzarella or pepper jack for unique flavors.
- Prep Time: 5 minutes
- Cook Time: 10 minutes
- Method: Stovetop
- Cuisine: American
- Diet: Vegetarian
Nutrition
- Serving Size: 1 sandwich
- Calories: 250 Kcal
- Sugar: 3g
- Sodium: 550mg
- Fat: 15g
- Saturated Fat: 8g
- Unsaturated Fat: 6g
- Trans Fat: 0g
- Carbohydrates: 22g
- Fiber: 1g
- Protein: 10g
- Cholesterol: 30mg
