
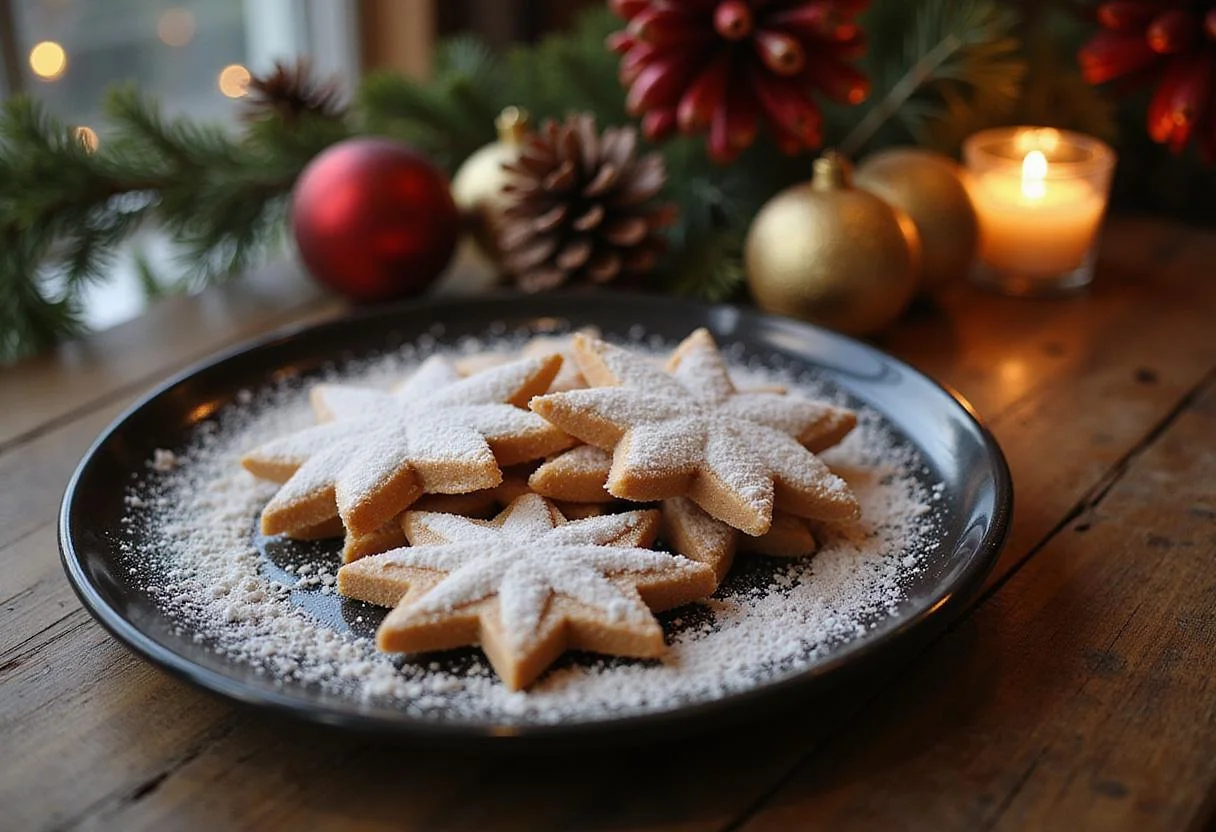
Hogsmeade Sugared Snowflakes: A Magical Treat for the Holidays ❄️🍬✨
1. Introduction: Discover the Magic of Hogsmeade Sugared Snowflakes
Welcome to the enchanting world of Hogsmeade Sugared Snowflakes, a delightful recipe inspired by the winter season in the famous wizarding village of Hogsmeade. These sugary, snowflake-shaped treats are not only a feast for the eyes but also a sweet indulgence that will transport you to a cozy cottage with a warm cup of cocoa. Perfect for festive gatherings and celebrations, these cookies combine the spirit of winter with a touch of magic. Imagine biting into a delicate, sweet snowflake, reminiscent of a stroll through a snow-covered Hogsmeade. Let’s dive in and create these enchanting Hogsmeade Sugared Snowflakes together! For more magical treats, explore our Harry Potter inspired recipes.
2. Ingredients: What You’ll Need for Your Hogsmeade Snowflakes
To create these delightful Hogsmeade Sugared Snowflakes, you’ll need the following ingredients. Ensure you have everything prepared to make the baking process smooth and enjoyable. These quantities are perfect for creating a batch that’s ideal for sharing, or perhaps… not!
- 2 ½ cups all-purpose flour
- 1 cup granulated sugar
- ½ cup unsalted butter, softened
- 1 large egg
- ½ cup milk
- 1 tablespoon vanilla extract
- 1 teaspoon baking powder
- 1 teaspoon salt
- Extra sugar for sprinkling – this adds a lovely sparkle to your Hogsmeade Sugared Snowflakes
3. Step-by-Step Instructions: Baking Your Hogsmeade Sugared Snowflakes
Follow these detailed instructions to bake your very own batch of Hogsmeade Sugared Snowflakes. Each step is crafted to ensure your cookies turn out perfectly every time. If you’re looking for other easy cookie recipes, consider trying these traditional chocolate chip cookies.
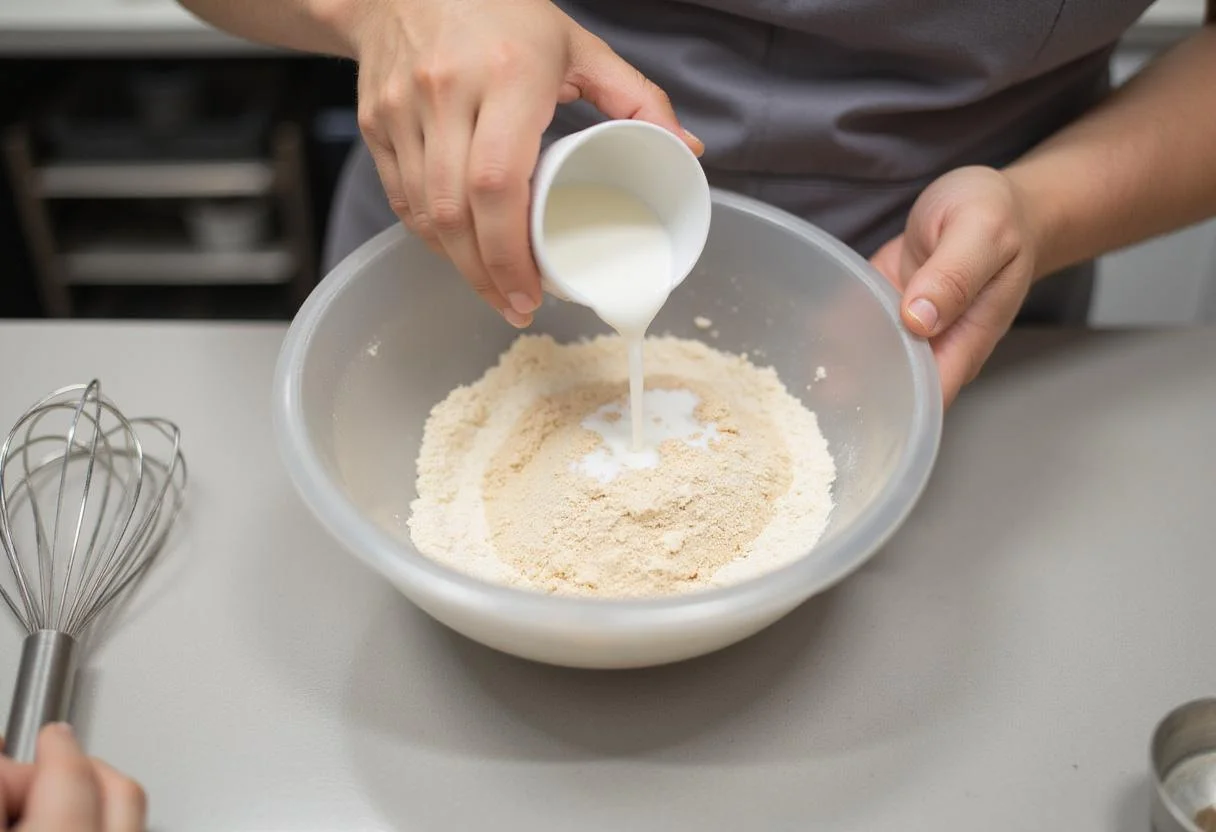
Step 1: Mix the Ingredients – Creating the Perfect Dough
In a large mixing bowl, combine the dry ingredients: flour, sugar, baking powder, and salt. Whisk them together to ensure even distribution. Then, add the wet ingredients: softened butter, egg, milk, and vanilla extract. Mix until you achieve a smooth dough consistency that is perfect for your Hogsmeade Sugared Snowflakes. The dough should be firm but pliable. If it’s too sticky, add a little more flour, one tablespoon at a time.
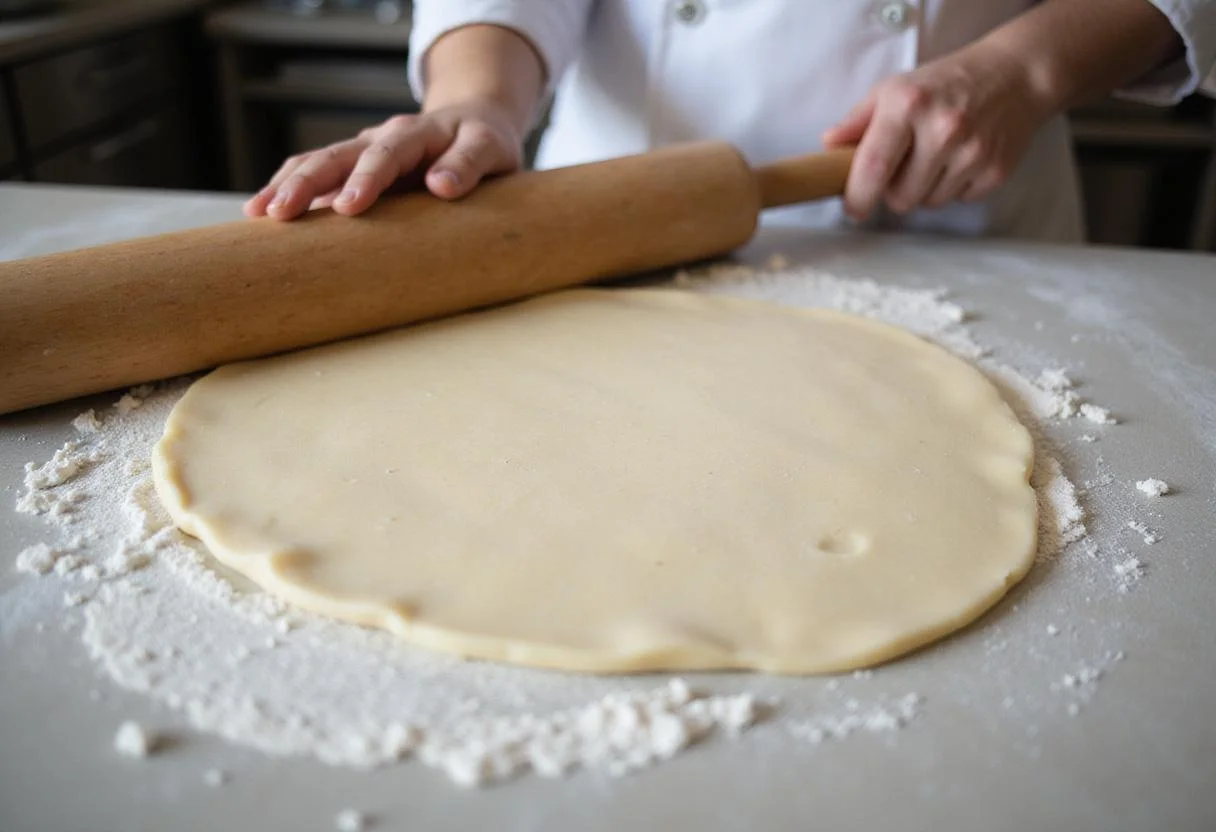
Step 2: Roll out the Dough – Setting the Stage for Snowflakes
Sprinkle your work surface with flour to prevent sticking and roll out the dough to a thickness of about ¼ inch. This thickness is key for making those delicate Hogsmeade Sugared Snowflakes. Rolling the dough evenly ensures that the cookies bake uniformly. If the dough is too soft to handle, chill it in the refrigerator for about 15-20 minutes before rolling.
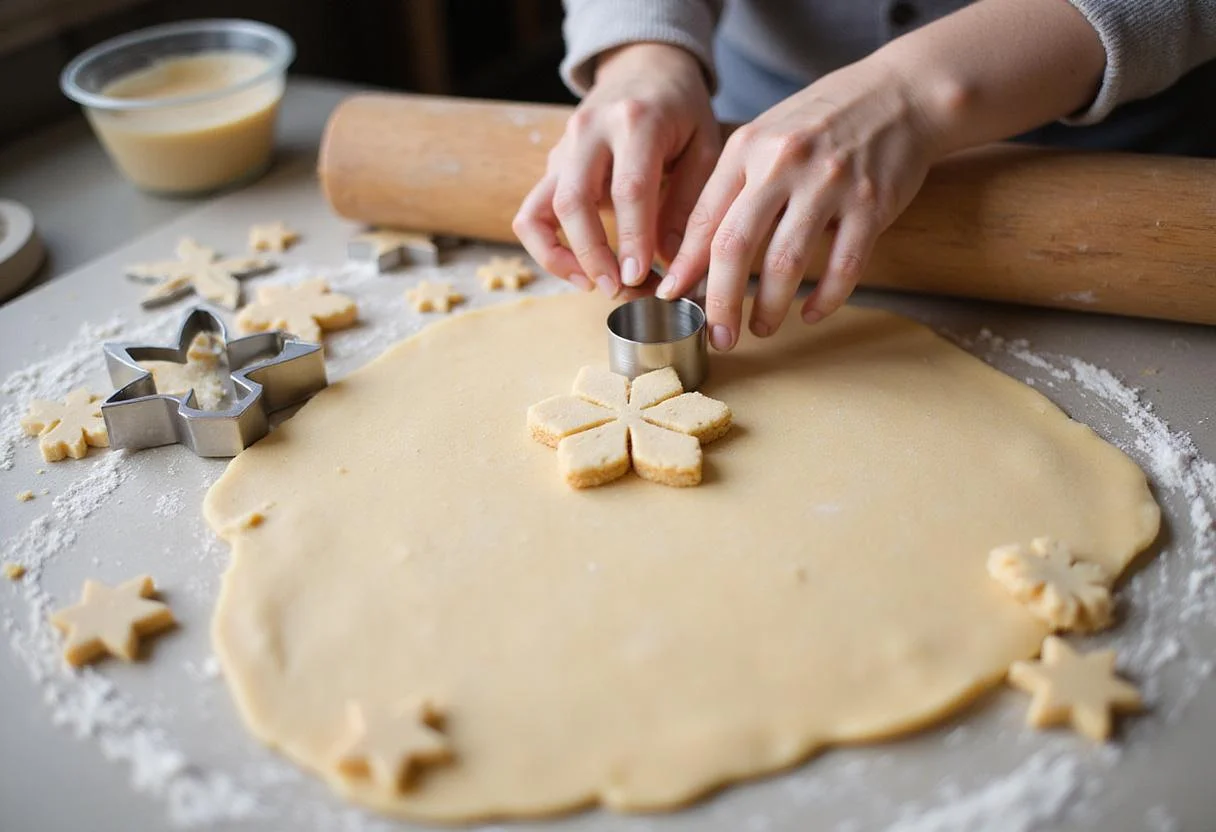
Step 3: Cut Out the Shapes – Crafting the Iconic Snowflakes
Use a snowflake-shaped cookie cutter to cut out the shapes from the rolled dough. This step not only creates the iconic look but also adds a visual charm to your Hogsmeade Sugared Snowflakes. Press the cutter firmly and cleanly to get well-defined shapes. Re-roll any scraps of dough to minimize waste and maximize your yield of these delightful snowflake cookies. For more fun shapes, check out these cookie mix cake recipe ideas!
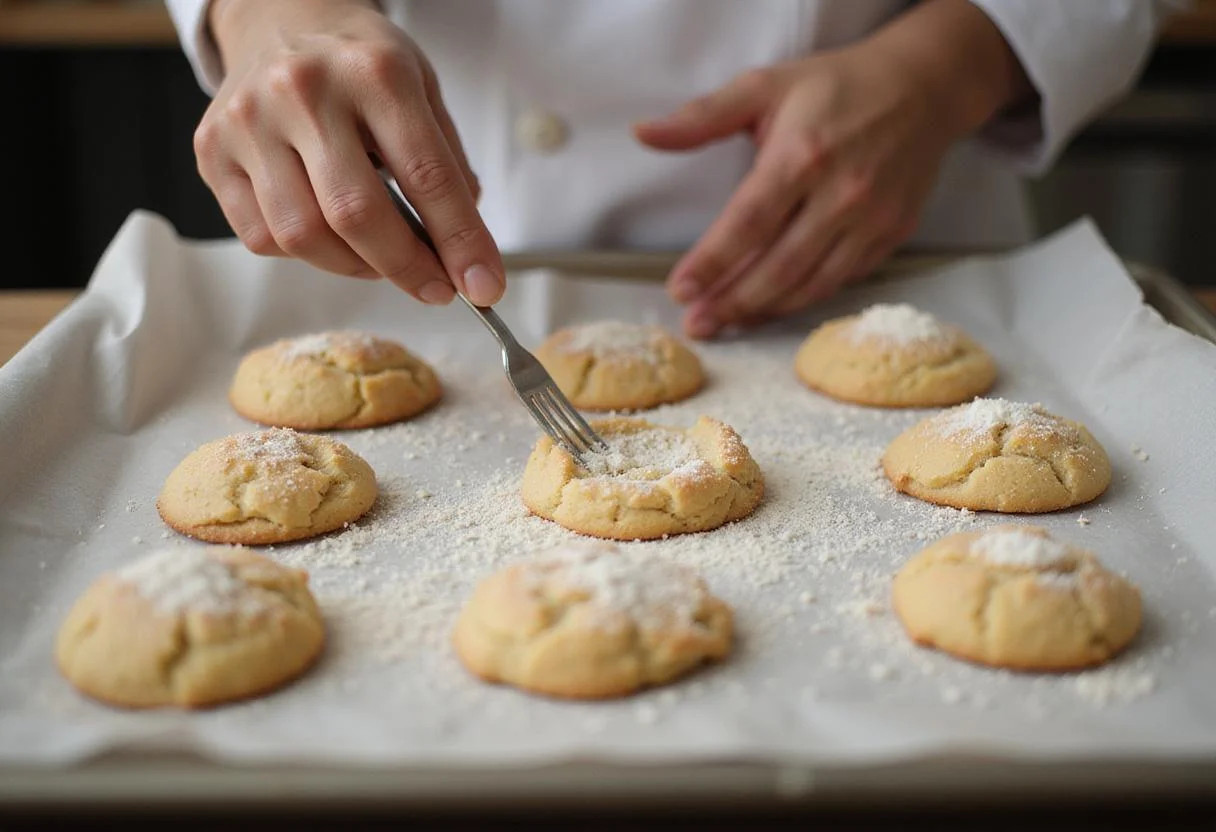
Step 4: Bake and Decorate – A Golden Finish
Place the shaped cookies on a baking sheet lined with parchment paper. This prevents sticking and ensures easy removal. Sprinkle generously with sugar to finish off your Hogsmeade Sugared Snowflakes before baking in a preheated oven at 350°F (175°C) for about 10-12 minutes or until the edges are golden brown. Keep a close eye on them to prevent burning. Once baked, let them cool on the baking sheet for a few minutes before transferring them to a wire rack to cool completely.
4. Storage Tips: Keeping Your Snowflakes Fresh
Proper storage is essential to maintain the flavor and texture of your Hogsmeade Sugared Snowflakes. Here’s how to keep them fresh: Store your baked Hogsmeade Sugared Snowflakes in an airtight container at room temperature for up to a week. For longer storage, freeze them in a single layer on a baking sheet and then place them in a freezer bag for up to three months. This prevents them from sticking together. Thaw them at room temperature before serving.
5. Serving Suggestions: Enjoying Your Hogsmeade Snowflakes
These delightful Hogsmeade Sugared Snowflakes are incredibly versatile and can be enjoyed in numerous ways.Consider pairing these cookies with a batch of quick easy air fryer smores, or a slice of French Vanilla Cake. Here are some serving suggestions: Perfect for holiday gatherings, tea parties, or as a treat for your loved ones. Pair them with hot cocoa, herbal tea, or a festive punch to elevate your dessert table. They also make a wonderful addition to gift baskets or as party favors. Get creative and enjoy!
6. FAQs: Your Questions About Hogsmeade Sugared Snowflakes Answered
Here are some frequently asked questions to help you perfect your Hogsmeade Sugared Snowflakes. For more cooking tips and recipes, you can also check out this Appalachian Foods group. Appalachian Foods Facebook Group
What can I substitute for butter in Hogsmeade Sugared Snowflakes?
You can use coconut oil or a vegan butter substitute for a dairy-free version of these cookies. Ensure that the substitute is softened to achieve the right consistency.
Can I use flavored extracts in my Sugared Snowflakes?
Absolutely! Almond or hazelnut extracts can add a unique flavor twist to your Hogsmeade Sugared Snowflakes. Start with a small amount (about ¼ teaspoon) and adjust to taste.
How do I decorate Hogsmeade Sugared Snowflakes for a festive look?
Consider icing, edible glitter, or candy beads for a festive look on your Hogsmeade Sugared Snowflakes. Royal icing is a great option for detailed designs. You could also use colored sugars for a simple yet elegant finish. For more inspirations, check out these best white chocolate raspberry cookie recipe.
7. Conclusion: Embrace the Magic of Hogsmeade Sugared Snowflakes
Making Hogsmeade Sugared Snowflakes is not just about baking delicious cookies; it’s about creating magical memories with friends and family. These cookies embody the charm and joy of the winter season. So gather your loved ones, follow the steps, and let the magic unfold in your kitchen this festive season! Share your snowflake creations and get inspired by others! If you enjoyed this recipe, you might also like our Halloween Birthday Cake.
Print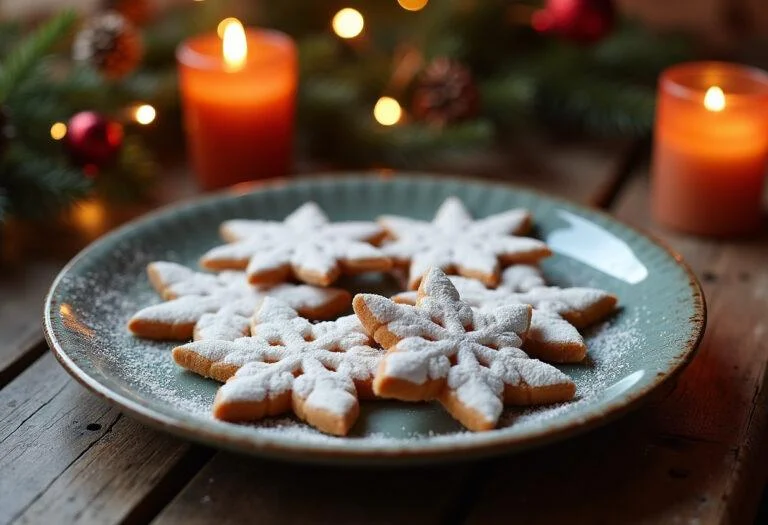
Hogsmeade Sugared Snowflakes
Hogsmeade Sugared Snowflakes are enchanting winter-themed cookies inspired by the wizarding village’s festive spirit. These delightful treats are not only visually stunning but also a mouthwatering indulgence, perfect for holiday gatherings and magical celebrations.
- Total Time: 32 minutes
- Yield: 24 cookies 1x
Ingredients
- 2 ½ cups all-purpose flour
- 1 cup granulated sugar
- ½ cup unsalted butter, softened
- 1 large egg
- ½ cup milk
- 1 tablespoon vanilla extract
- 1 teaspoon baking powder
- 1 teaspoon salt
- Extra sugar for sprinkling
Instructions
- In a large mixing bowl, combine flour, sugar, baking powder, and salt. Add butter, egg, milk, and vanilla extract. Mix until a smooth dough forms.
- Sprinkle your work surface with flour and roll out the dough to a thickness of about ¼ inch.
- Use a snowflake-shaped cookie cutter to cut out the shapes from the rolled dough.
- Place the shaped cookies on a baking sheet lined with parchment paper. Sprinkle with sugar and bake in a preheated oven at 350°F (175°C) for 10-12 minutes or until golden.
Notes
- Store the cookies in an airtight container at room temperature for up to one week.
- For longer storage, freeze them in a single layer before placing them in a freezer bag for up to three months.
- Consider using flavored extracts for a twist on the classic recipe.
- Prep Time: 20 minutes
- Cook Time: 12 minutes
- Category: Dessert
- Method: Baking
- Cuisine: American
- Diet: Vegetarian
Nutrition
- Serving Size: 1 cookie
- Calories: 150 Kcal
- Sugar: 10g
- Sodium: 80mg
- Fat: 7g
- Saturated Fat: 4g
- Unsaturated Fat: 2g
- Trans Fat: 0g
- Carbohydrates: 20g
- Fiber: 1g
- Protein: 2g
- Cholesterol: 20mg
