© Original Recipe By Serena Recipes ©
🍗✨ Easy Turkey Teriyaki Bowls: A Quick, Healthy Powerhouse Dinner in Under 30 Minutes!
1. Introduction
Craving something savory, sweet, and satisfying—but don’t want to sacrifice nutrition or spend hours in the kitchen? Enter these turkey teriyaki bowls: tender lean turkey, caramelized bits from high-heat searing, and a rich, glossy teriyaki sauce that clings beautifully to grains or greens. This quick teriyaki dinner comes together faster than takeout and delivers more nutrients than most delivered meals. I developed this recipe after days of cooking complex curries and stews—I craved clean, fast fuel that still tasted like comfort. With just 10 minutes of prep and 15 minutes of cooking, you get a healthy teriyaki bowl that’s bursting with umami, textured with vegetables, and centered around vibrant, whole ingredients. Perfect for meal-prep, busy weeknights, or even a light Saturday lunch.
2. Why You’ll Love This Recipe
- Ready in under 30 minutes—faster than ordering in, and you control what goes in.
- One-pan wonder: Cook the turkey, veggies, and reduction sauce all in one skillet, so cleanup is a breeze.
- Meal-prep gold: Stores beautifully for 3–4 days, making it ideal for lunches or quick reheats.
- Family-friendly: Kids love the sweetness, adults appreciate the umami depth—everyone cleans their bowl.
- Adaptable: Swap in ground chicken, tofu, or tempeh; use brown rice, quinoa, or cauliflower rice—your rules.
3. Ingredient Notes
What makes this recipe truly special isn’t just the convenience—it’s the thoughtful choices behind each ingredient. Start with ground turkey breast (not blend) for a leaner profile without dryness. I’ve tried both, and the breast version holds moisture better when seared hot and fast. The teriyaki sauce hinges on low-sodium tamari (or coconut aminos for gluten-free)—high-sodium soy sauce can easily overpower the subtle balance. For thickness and body, I use real maple syrup instead of corn syrup-laden alternatives. The aroma? A splash of fresh ginger (microplaned, not grated) releases volatile oils that dried ginger can’t match. Don’t skip the sesame oil—it’s added *after* cooking to preserve its nutty, complex fragrance, not burned off in high heat. And for visual appeal and crunch, sugar snap peas and shaved carrot ribbons brighten the plate without added sugar or oil.
4. Kitchen Tools You Need
Good tools elevate this recipe from “fine” to “fabulous.” Here’s the gear I reach for every time—some are personal favorites, others are game-changers:
- Ninja Air Fryer Pro Crisp & Roast 4-in-1: If you prefer baked turkey meatballs instead of skillet-ground turkey, this air fryer delivers crispy edges with 70% less oil. I tested it side-by-side—results were nearly identical to pan-seared but hands-off.
- T-fal 14-Piece Hard Anodized Nonstick Cookware Set: For the skillet phase, nonstick is your friend. This set heats evenly, releases turkey beautifully, and resists scratches—even with metal utensils. The 12-inch skillet is ideal for family-sized portions.
- Deluxe 33-Piece Silicone Utensil Set: Stirring teriyaki sauce? You want heat-resistant, non-scratch tools. These are BPA-free, color-coded, and survive daily use without warping.
- Fullstar Ultimate Veggie Prep Master: Shaving carrots or slicing snap peas thinly takes seconds with this all-in-one chopper. Consistent cuts = even cooking and restaurant-ready presentation.
- JoyJolt Airtight Glass Food Storage Set: Store leftovers in these BPA-free glass containers—they’re oven-safe, freezer-proof, and stack perfectly in your fridge. No more plastic taste or warping!
Bonus pro tip: A small saucepan (like the 2-quart pot in most cookware sets) keeps your teriyaki reduction trouble-free—no splatter, no hot spots.
5. How to Make Easy Turkey Teriyaki Bowls
Phase 1: Prep (5 minutes)
First, whisk the teriyaki glaze in a small bowl: ¼ cup low-sodium tamari, 2 tbsp maple syrup, 1 tbsp rice vinegar, 1 tsp fresh grated ginger, 2 minced garlic cloves, and 1 tsp cornstarch (this is your thickener—add last to avoid clumping). Set aside. Then, prep your veggies: trim snap peas, peel and shave carrot into ribbons using a vegetable peeler, and thinly slice green onions. Measure 1½ cups cooked rice or cauli-rice for serving. If using frozen peas, thaw them first—they’ll release less water during cooking and keep your glaze shiny, not watery.
Phase 2: Sear & Simmer (10 minutes)
Heat a large nonstick skillet over medium-high heat until it’s hot enough to make a drop of water sizzle instantly. Add 1 tsp avocado oil—just enough to coat. Drop in the ground turkey and break it up with a wooden spoon. Don’t stir immediately—let it sit 2 minutes to develop golden-brown caramelized bits (that’s flavor gold!). Then stir and cook until no pink remains, ~5 minutes. Push turkey to one side, add carrots and snap peas to the other, and sauté 2 minutes until peas brighten and carrots soften slightly. Now, give your teriyaki glaze a quick stir (cornstarch settles!) and pour it over the center. Let it bubble and thicken for 1½ minutes—stir gently until it becomes glossy and coats the back of a spoon.
Phase 3:Finish & Serve (2 minutes)
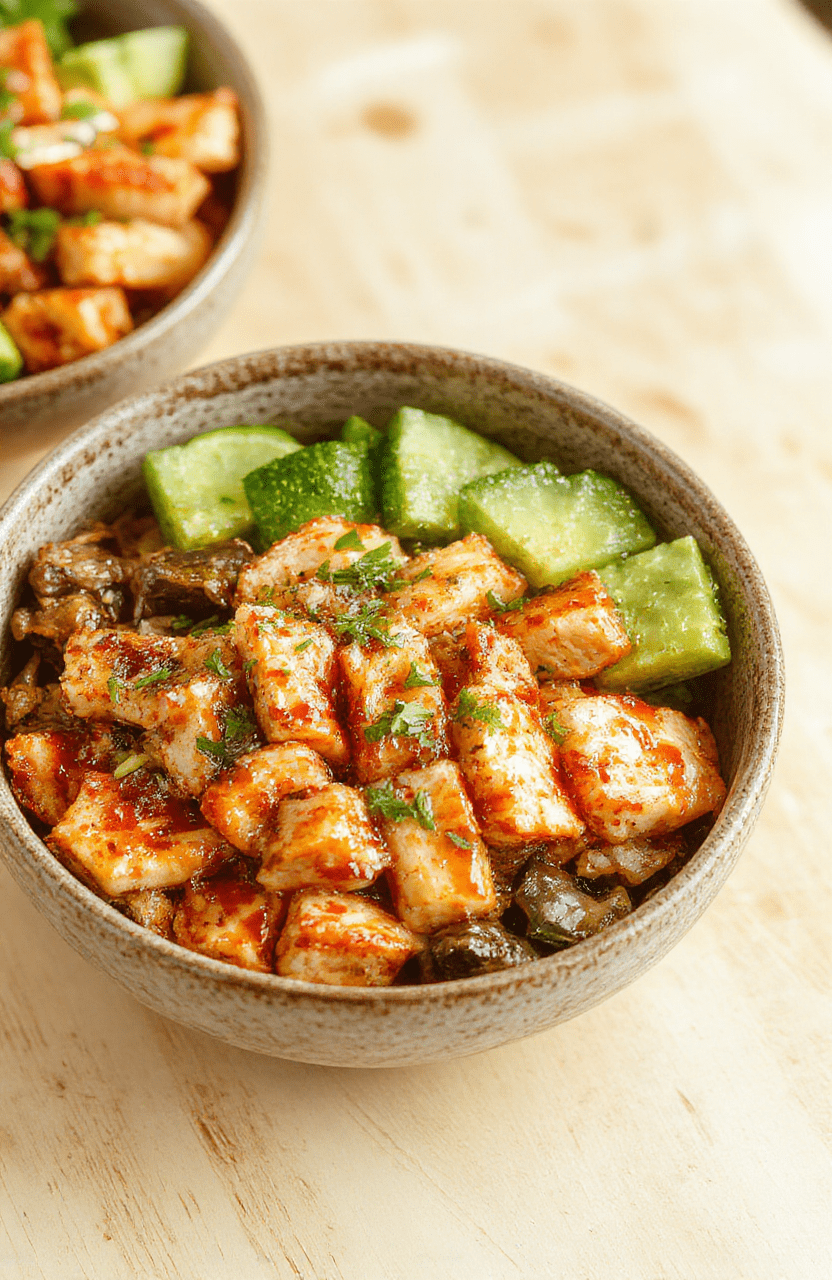
Remove from heat. Stir in 1 tsp toasted sesame oil (off-heat preserves its aroma) and stir everything together until glistening. Taste and adjust—sometimes a squeeze of lime brightens it; if too salty, a tiny splash of water balances it. Divide rice among bowls, top generously with turkey mixture, then Garnish with sliced green onions, sesame seeds, and extra black pepper. Done! You’ve just made a restaurant-quality meal in 17 minutes flat.
6. Expert Tips for Success
- Temperature matters: Your skillet must be *hot* before adding turkey. Low heat = steamed, rubbery meat. High heat = sear, not steam.
- Don’t overcrowd the pan: Cook in two batches if your skillet fits less than 1¼ lbs turkey. Crowding drops the temperature and steams instead of sears.
- Let the glaze thicken off-heat: Glazes continue thickening as they cool. Pull the pan when it’s slightly thinner than heavy cream—it will reach perfect viscosity sitting on the plate.
- Use real maple syrup: “Pure” or “Grade A” amber is essential. imitation syrups with high-fructose corn syrup create a bland, sticky glaze.
7. Variations & Substitutions
Got dietary needs or preferences? This base recipe plays well with others:
- Vegetarian: Swap turkey for pressed firm tofu or tempeh. Pan-fry until golden before adding sauce.
- Low-carb: Use zucchini noodles (zoodles) or cauliflower rice, and finish with a dash of sriracha for heat.
- Spicy version: Add ½ tsp red pepper flakes with garlic, or stir in 1 tbsp gochujang with the glaze.
- Sweetener swaps: Honey or coconut sugar work in equal amount—but reduce heat slightly to prevent burning.
- Veggie upgrades: Toss in edamame, bell peppers, or brocolli florets during the last 3 minutes of sautéing.
8. Storage & Reheating
Store in an airtight container (like the JoyJolt glass set) in the fridge for up to 4 days. The veggies soften slightly, so I recommend keeping the glaze separate if meal-prepping longer than 2 days—combine right before reheating. To reheat: microwave in 60-second intervals, stirring between, or warm in a skillet over medium-low until piping hot (about 5 minutes). For extra crispiness, air fry leftover turkey mix at 375°F for 3–4 minutes. Never freeze with rice—the texture turns gummy. Instead, freeze turkey+veg mixture for up to 3 months and cook fresh rice when ready to serve.
9. FAQ
Q: Can I use teriyaki sauce from the bottle instead of making my own?
A: Yes, but choose brands with no high-fructose corn syrup and ≤360mg sodium per tablespoon (like Kikkoman Less Sodium). Reduce added salt by ½ tsp, as store sauces vary wildly in saltiness.
Q: My glaze turned grainy—what happened?
A> Cornstarch clumps when Added to cold liquid and poured into a hot pan. Always mix cornstarch with *cold* liquid first (a “slurry”), and stir the glaze *immediately* before adding to the hot pan. My pro tip: Whisk cornstarch with 1 tbsp cold water *before* combining with other sauce ingredients.
Q>Is ground turkey healthier than ground beef here?
A: For the same lean percentage (93% lean is perfect), turkey has slightly less saturated fat and similar protein. But flavor-wise? Fat = flavor. That’s why I add 1 tsp sesame oil—it compensates for turkey’s lean nature while adding nutrients like sesamin, a potent antioxidant.
Q: Can I make this ahead for a crowd?
A: Absolutely! Double the batch, cook turkey separately, and store sauce and turkey in fridge. When ready to serve, reheat turkey in skillet, add sauce, toss, and serve over freshly cooked rice. The turkey stays tender, not rubbery.
10. Conclusion
These easy turkey teriyaki bowls are my go-to for nights when “healthy” shouldn’t mean “bland” and “quick” shouldn’t mean “compromised.” Balanced, vibrant, and genuinely delicious—and with tools like the T-fal cookware set, prep is half the fun. If you try it, tag me on social or leave a comment below—I love hearing how you customize your bowls. And if you’re craving more comfort-in-a-bowl ideas, explore our one-pot sausage rice dinner or creamy coconut chicken. Happy cooking!
Print
Easy Turkey Teriyaki Bowls
A quick, healthy one-bowl meal with lean turkey, jasmine rice, and fresh veggies in a homemade teriyaki glaze.
- Total Time: 25 minutes
- Yield: 4 servings
Ingredients
- 1 lb ground turkey
- 1 cup jasmine rice, cooked
- 2 tbsp sesame oil
- 2 cloves garlic, minced
- 1 tbsp fresh ginger, grated
- ⅓ cup low-sodium soy sauce
- 2 tbsp honey
- 1 tbsp rice vinegar
- 1 tsp sesame seeds
- 2 green onions, sliced
- 1 cup broccoli florets, steamed
- ½ cup shredded carrots
Instructions
- Cook jasmine rice according to package instructions; set aside.
- Heat 1 tbsp sesame oil in a large skillet over medium-high heat. Add turkey and cook until browned (5–6 mins).
- Add garlic and ginger; cook 1 minute until fragrant.
- Stir in soy sauce, honey, and rice vinegar. Simmer 3–4 mins until sauce thickens and coats turkey.
- Divide rice among bowls. Top with turkey, steamed broccoli, shredded carrots, green onions, and sesame seeds.
Notes
- For gluten-free, use tamari instead of soy sauce.
- Prep ahead: Cook rice and chop veggies ahead for faster weeknight assembly.
- Optional add-ins: edamame, snap peas, or sliced mushrooms.
- Prep Time: 10 minutes
- Cook Time: 15 minutes
- Method: Stovetop
- Cuisine: Japanese-inspired
- Diet: High-Protein
Nutrition
- Serving Size: 1 bowl (without optional add-ins)
- Calories: 380 Kcal
- Sugar: 14g
- Sodium: 620mg
- Fat: 12g
- Saturated Fat: 3g
- Unsaturated Fat: 8g
- Trans Fat: 0g
- Carbohydrates: 42g
- Fiber: 3g
- Protein: 28g
- Cholesterol: 75mg
