
🍞 Crispy Crust, Airy Crumb: Your Perfect No-Knead Artisan Bread is Done in Under 2 Hours (No Pro Skills Required!)
1. Introduction
Imagine slicing into a warm, golden loaf with a shatteringly crisp crust and an innerview of delicate, airy holes—baked right in your own kitchen, no professional oven or kneading required. This no-knead artisan bread delivers exactly that, using just five pantry staples and one trusty Dutch oven. Developed after years of testing high-hydration doughs and refining rise times, this recipe delivers reliable, bakery-quality results without the stress or special equipment. If you’ve ever feared sourdough or thought crusty home baked loaf was only for professionals, this is your moment to shine.
2. Why You’ll Love This Recipe
- ✅ Zero kneading—just mix, fold, and wait (perfect for busy weeknights or Sunday baking sessions)
- ✅ One pot, one bowl—minimal cleanup and maximum flavor development
- ✅ Ready in ~3 hours (mostly hands-off rise time)
- ✅ Versatile—pair with honey & butter, slash for seeds, or transform into sandwich loaves
- ✅ Cheaper than store-bought—a loaf costs less than $1.50 in whole wheat flour!
Once baked, this bread pairs beautifully with our Cheesy Burrito Bake, or crisp up slices for dunking in our Peach Lemonade-infused bread pudding (yes, really!).
3. Ingredient Notes
Don’t skip the *why*—these details separate good loaves from great ones:
- Unbleached Bread Flour or French Type 55: Higher protein (12–13%) = better gluten structure and chew. All-purpose *works*, but crust won’t be as robust.
- Fine Sea Salt (not table salt): Iodized table salt can discolor dough and give off bitter notes. Fine sea salt dissolves cleanly and enhances fermentation.
- Active Dry Yeast or Instant Yeast: No need to proof—just sprinkle it in. Use fresh yeast (check expiry!) for fastest rise. (Pro Tip: Store yeast in the freezer for 6+ months.)
- Filtered or Room-Temp Water: Cold water slows fermentation; chlorinated tap can inhibit yeast. Room-temp water (75–78°F) wake up the yeast gently.
- Optional Add-Ins: A tablespoon of barley malt syrup adds depth and browning, or 1 tsp honey for subtle sweetness. Rosemary, olives, or cracked pepper can be folded in before shaping.
4. Kitchen Tools You Need
You already have most tools—but having the *right* ones makes all the difference:
- 4–6 qt Cast Iron Dutch Oven with Tight-Fitting Lid (Lodge or Le Creuset). The enclosed heat creates steam, triggering dramatic oven spring and crackling crust. T-fal 14-Piece Hard Anodized Nonstick Cookware Set includes a perfectly sized Dutch oven and is ideal for beginners.
- Large Mixing Bowl + Dough Scraper: A 7″ metal dough scraper (or sturdy spatula) makes folding and transferring foolproof.
- Bowl Cover + Kitchen Towel or Plastic Wrap: Use damp linen to prevent skinning during long rests.
- Rice Flour or Cornmeal: For dusting the proofing basket or pan—*not* regular flour, which burns at high heat.
For serious bakers: the KitchenAid Artisan 5-Quart Stand Mixer (with dough hook) is a game-changer for mixing—though this recipe remains *truly* no-mixer needed!
5. How to Make No-Knead Artisan Bread
Time: 20 min prep + 2h 45m rest + 35–45 min bake
Phase 1: Mix & Initial Ferment (10 minutes)
In a large bowl, whisk together:
- 3 cups (360g) unbleached bread flour
- 1¼ tsp (7g) instant yeast
- 1½ tsp (9g) fine sea salt
Pour in 1¼ cups (300g) room-temp water. Mix with a wooden spoon until no dry bits remain—dough will be shaggy and sticky. Cover bowl with a towel and rest at room temperature for 2 hours. You’ll see bubbles, doming, and a slight sour aroma—this is proof of healthy fermentation.
Phase 2: Shape &冷藏 (Cold Ferment)
Scrape dough onto a lightly floured surface. Fold edges toward center, then flip smooth-side up. Cup hands around dough and gently rotate to tighten surface tension. Place seam-side up in a floured bowl or proofing basket, cover, and refrigerate for 12–18 hours. This slow chill builds flavor and makes shaping easier.
Phase 3: Preheat & Shape Final Loaf (30 minutes before bake)
Place Dutch oven (with lid) in oven and preheat to 450°F (230°C) for at least 30 minutes.
Flip cold dough seam-side down onto a parchment paper rectangle. Shape into a round, then slash top ½” deep in a “X” or single long cut with a razor. This controls expansion and looks stunning.
Phase 4: Bake (45 minutes total)
Carefully lift dough (with parchment!) and drop into hot Dutch oven. Cover with lid. Bake 20 minutes. Reduce heat to 425°F (220°C), remove lid, and bake 15–25 more minutes until deep mahogany brown and internal temp hits 205–210°F. Let rest 30 minutes *minimum* before slicing—this lets the crumb set and prevents gummy slices.
6. Expert Tips for Success
- 🔥 Preheat the Dutch oven thoroughly: An underheated pot = flat loaf. Use an oven thermometer—most thermostats drift.
- ❄️ Cold dough + hot pot = maximum spring. Don’t skip the fridge rest!
- 🥢 Slash aggressively: Shallow slashes close up; deep slashes “bloom” open beautifully.
- 🔥 No Dutch oven? Use a sheet pan + oven dish of water for steam—but results won’t be as crusty.
- ⏱️ Over-proofed dough? It will sag and deflate. Under-proofed dough won’t rise well. Aim for dough that springs back slowly when poked.
7. Variations & Substitutions
- Whole Wheat Version: Replace 1 cup bread flour with whole wheat flour (max). Add 2 tbsp extra water—whole grains absorb more.
- Seeded Loaf: Fold in ¼ cup sunflower, flax, and pumpkin seeds during initial mix.
- Sourdough-style: Replace yeast with ¼ cup active sourdough starter + ¼ cup water and ½ cup flour. Ferment 6–8 hrs at room temp before chilling.
- No Salt? No problem—but salt is flavor and structure hero. Try ¾ tsp Celtic gray salt for trace minerals.
For savory lovers, turn this loaf into a star by slicing and topping with our hummus & grilled veggie toast.
8. Storage & Reheating
- Room Temp (1–2 days): Store unwrapped on a cutting board, cut-side down on a plate. Revive crust in 350°F oven for 5–7 min.
- Fridge (3–4 days): Wrap tightly in foil. Reheat in 325°F oven for 10–12 min.
- Freezer (up to 3 months): Slice first! Freeze in parchment-separated layers. Toast straight from frozen—or thaw and warm in oven.
Never store warm bread in plastic—it traps moisture and turns crust rubbery.
9. FAQ
<-question>Why is my no-knead bread dense?Over-kneading isn’t the issue—under-proofing or an underheated oven is. Next time, let dough reach 78°F before baking, and verify oven temp with a thermometer. A dense loaf often means it was baked too soon or the Dutch oven wasn’t hot enough.
Yes! Use a heavy oven-safe pot with lid, or bake on a sheet pan with a separate pan of boiling water on the lower rack. Cover with a giant stainless steel bowl for the first 20 min—but a Dutch oven is safest for even steam.
You likely didn’t use enough rice flour or cornmeal to dust the bottom, or skipped the parchment paper. Always line the pot or basket with parchment and use a thick layer of rice flour (corn flour can burn).
Absolutely—but bake in two separate Dutch ovens. One giant loaf won’t cook through evenly. Or halve the recipe if you’re baking for one or two.
10. Conclusion
This no-knead artisan bread is your gateway to real bread joy: minimal effort, maximum pride. That first crack of the crust, the butter melting into the honeycomded crumb—it’s pure comfort, made in your kitchen. Now go forth, tweak the recipe, document your journey in a Clever Fox DIY Family Recipe Journal, and remember: even bakers with 30 years of experience still get excited about a fresh loaf. 🍞✨
Print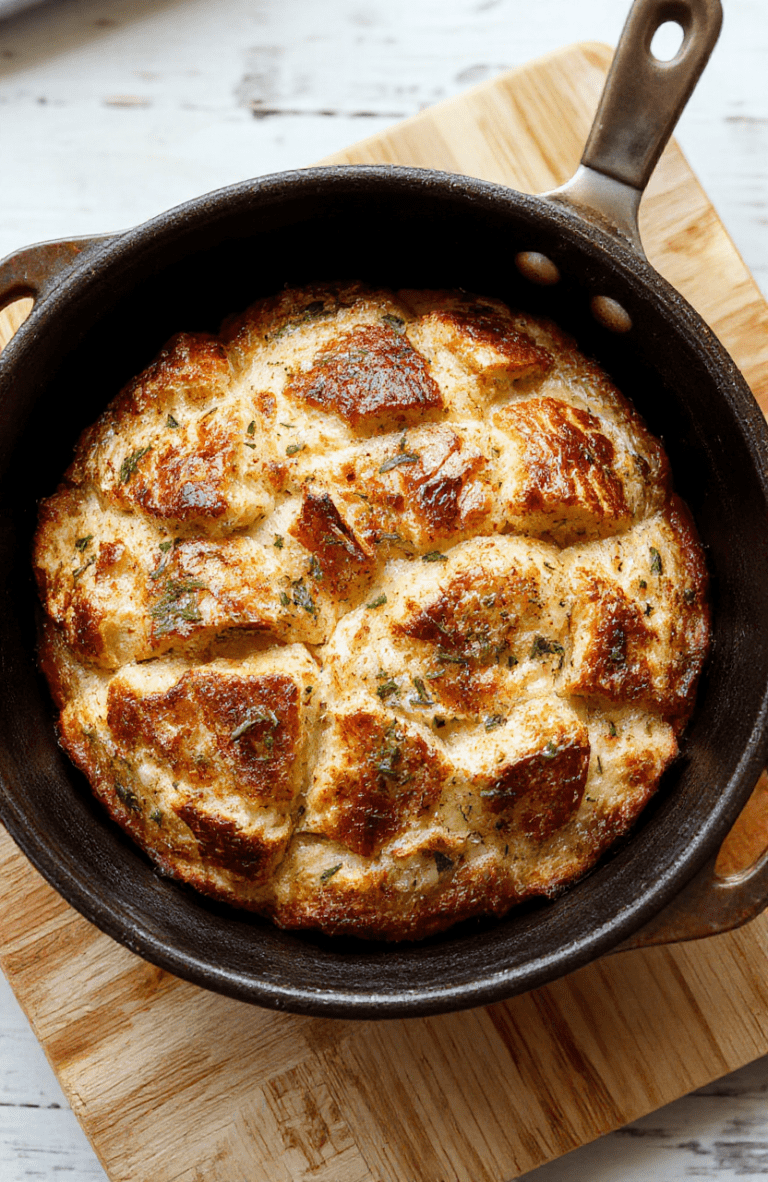
Easy No-Knead Artisan Bread in Dutch Oven
This foolproof no-knead artisan bread delivers a blistered crust and open crumb using just four pantry staples. Baked in a Dutch oven, it requires no fancy techniques—perfect for beginners and seasoned bakers alike.
- Total Time: 1 hour 45 minutes (plus 12–18 hours rising)
- Yield: 1 (12-ounce) loaf 1x
Ingredients
- 3 cups (360g) all-purpose flour, plus extra for dusting
- 1½ tsp (9g) kosher salt
- ½ tsp (1g) active dry yeast
- 1½ cups (360ml) warm water (100–110°F)
- Optional: 1 tbsp (12g) honey or maple syrup for slight sweetness
Instructions
- In a large bowl, whisk together flour, salt, yeast, and honey (if using).
- Add warm water and stir with a wooden spoon until a shaggy dough forms—no kneading needed.
- Cover bowl with plastic wrap and let rise at room temperature for 12–18 hours (overnight is ideal).
- Place a 6-qt Dutch oven (with lid) in oven and preheat to 450°F (230°C) for 30 minutes.
- Transfer dough to a heavily floured surface, shape into a round, and place on parchment paper.
- Carefully lower dough (on parchment) into hot Dutch oven, cover, and bake 30 minutes.
- Remove lid, brush crust with water for extra crispness, and bake 15–20 minutes more until deep golden brown and internal temp reaches 205–210°F (96–99°C).
- Cool completely on a wire rack before slicing.
Notes
- For extra flavor, substitute ¼ cup flour with whole wheat or rye flour.
- Store cooled bread in a paper bag at room temp for up to 3 days—or freeze for up to 3 months.
- Prep Time: 15 minutes
- Cook Time: 45 minutes
- Method: Baking
- Cuisine: American
- Diet: Vegetarian
Nutrition
- Serving Size: 1 slice (1/12 loaf)
- Calories: 110 Kcal
- Sugar: 0g
- Sodium: 180mg
- Fat: 0.5g
- Saturated Fat: 0g
- Unsaturated Fat: 0g
- Trans Fat: 0g
- Carbohydrates: 23g
- Fiber: 1g
- Protein: 4g
- Cholesterol: 0mg
