🍋✨ Crispy Lemon Pecorino Chicken: A Zesty Weeknight Chicken Dinner That Steals the Show
1. Introduction
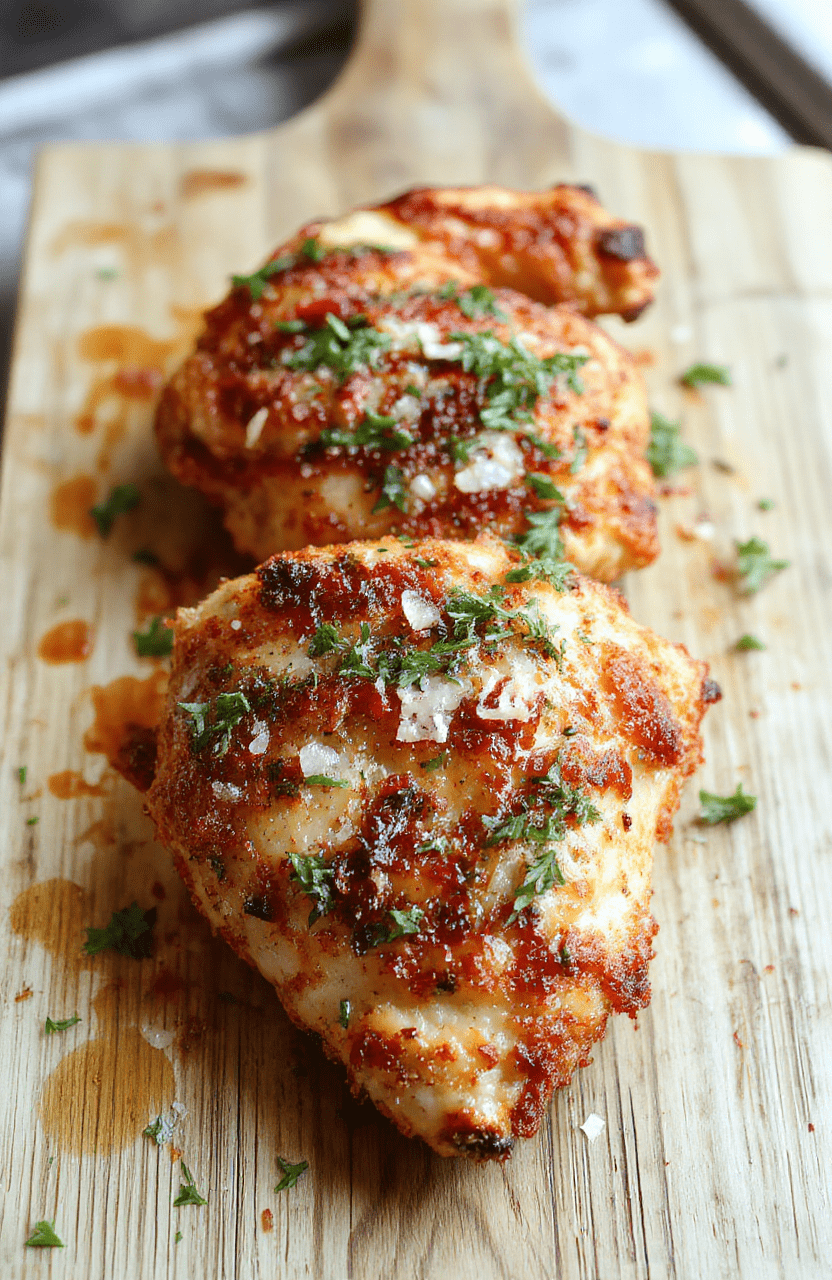
There’s something incredibly satisfying about a crispy lemon pecorino chicken dish—golden, crackling skin hugged by bright, zesty lemon, finished with the sharp, salty punch of aged Pecorino. This recipe is a game-changer for anyone craving bold Mediterranean flavors without sacrificing simplicity. In just under 30 minutes, you’ll have restaurant-quality chicken that’s juicy inside, with a shatteringly crisp topping that’s loaded with personality. Whether you’re cooking for weeknight dinner guests or treatin’ yourself, this dish pairs beautifully with roasted vegetables, a fresh grain bowl, or even over a bed of creamy polenta. Pair it with my Refreshing Peach Lemonade for the ultimate lemon-forward experience.
2. Why You’ll Love This Recipe
Ready in 25–30 minutes—perfect for busy weeknights.
No complicated techniques—just simple pan-searing and broiling.
One pan, minimal cleanup—everything starts and finishes in the same skillet.
Balanced flavors—bright lemon, savory garlic, and tangy cheese create a depth that feels luxurious.
Healthy & satisfying—lean chicken breast packed with protein and Mediterranean goodness.
3. Ingredient Notes
Every ingredient in this crispy lemon pecorino chicken has a purpose—here’s why I source and pair them the way I do.
Chicken breast— boneless, skin-on. Yes, skin-on! It’s the secret to that crave-worthy crispness. I avoid flour or breadcrumbs entirely—the natural fat renders and browns beautifully under high heat.
Lemon—use fresh-squeezed juice (about 2 large lemons) for brightness and a little zest to add aromatic lift. bottled juice lacks the oil-rich aroma that makes this dish pop.
Pecorino Romano—not substitute blindly! Its salty, sheep’s milk sharpness balances the lemon perfectly. Skip mild Pecorino Sardo or Parmesan—they’re too sweet and won’t deliver that same punch.
Garlic & red pepper flakes— freshly minced garlic sizzles fast, so add it *after* the chicken sears to prevent burning. Red pepper flakes? Optional but highly recommended; they cut through the richness.
Olive oil—extra virgin, cold-pressed. It handles the heat beautifully and contributes herbal depth.
4. Kitchen Tools You Need
You don’t need a full pro kitchen—but having a few smart tools makes crispy lemon pecorino chicken foolproof and fun.
The Ninja Air Fryer Pro Crisp & Roast 4-in-1 delivers that next-level crisp without constant attention—ideal if you want zero-oven cleanup. Its even airflow ensures golden chicken on every edge.
For stove-top searing (my preferred method), a heavy-bottomed cast iron skillet or T-fal 14-Piece Hard Anodized Nonstick Cookware Set ensures superior heat retention and searing power.
Deluxe 33-Piece Silicone Utensil Set—heat-resistant, non-scratch, and perfect for flipping chicken delicate skin without tearing it.
Fullstar Ultimate Veggie Prep Master for quick lemon zesting and fine garlic mincing—because texture matters in your coating.
JoyJolt Airtight Glass Food Storage Set—store leftovers in style and keep them fresh for up to 4 days.
5. How to Make Crispy Lemon Pecorino Chicken
Let’s break this down into 3 simple phases: Prep, Sear, and Finish & Crisp.
Phase 1: Prep — 5 Minutes
Pat chicken breasts very dry with paper towels—this is non-negotiable for crispiness. Season both sides with salt and black pepper. In a small bowl, whisk together 2 tbsp lemon juice, 1 tsp lemon zest, 3 tbsp grated Pecorino, 1 minced garlic clove, ½ tsp red pepper flakes (optional), and 1 tbsp olive oil. Spread this mixture over the top of each breast, pressing gently so it adheres.
Phase 2: Sear — 4–5 Minutes Per Side
Heat 1 tbsp olive oil in a large oven-safe skillet (or your Ninja/air fryer basket) over medium-high heat until shimmering. Place chicken skin-side down and sear undisturbed for 4–5 minutes until deeply golden and crispy. Flip carefully and cook another 3–4 minutes until the chicken reaches 160°F internally. The pan should look richly browned—don’t rush this step!
Phase 3: Finish & Crisp — 2–3 Minutes
Preheat your broiler to high. Transfer the skillet to the top rack and broil 2–3 minutes, or until the cheese topping is bubbly, golden, and slightly charred in spots. Watch closely—it goes fast! Rest the chicken for 3–5 minutes before serving. That final rest lets juices redistribute, ensuring moist meat every time.
6. Expert Tips for Success
Do NOT skip patting chicken dry. Moisture is the crisp enemy. Seriously—dry chicken = golden crust. Wet chicken = steamed skin.
Cook skin-side down first, no peeking. Let that crust build. Moving it too soon = tearing.
Use freshly grated Pecorino. Pre-grated cheese contains anti-caking agents that hinder melting and browning.
Don’t overcrowd the pan. Give pieces space—steam is the saboteur of crispiness.
Finish under the broiler, not the oven. Broiling delivers intense direct heat for that signature crunch without overcooking the chicken.
Let it rest. Skipping this = dry chicken. Always. Even 3 minutes makes a measurable difference.
7. Variations & Substitutions
Dairy-free? Swap Pecorino for toasted pine nuts +nutritional yeast (1:2 ratio) for umami and crunch.
Low-sodium? Use half the Pecorino and boost brightness with extra lemon zest and a splash of white wine vinegar in the glaze.
Spicier? Add ¼ tsp smoked paprika to the coating, or a drizzle of honey after cooking to balance heat.
Low-carb? Skip any grain sides and serve over cauliflower rice or my Mediterranean Veggie Bowl (use extra zucchini and olives).
8. Storage & Reheating
Store leftovers in an airtight glass container for up to 3 days.
To reheat: Air fryer is king. 350°F for 4–5 minutes—revives the crisp beautifully.
If reheating in oven: 400°F on a wire rack for 8–10 minutes to avoid sogginess.
Microwave? It’s possible. But the skin will soften. For best results, finish in an air fryer for 1–2 minutes just before serving.
9. FAQ
Can I use chicken thighs instead? Absolutely. Boneless, skin-on thighs hold up beautifully to high heat and add richness. Increase cook time to 6–7 minutes per side, then broil 2 minutes.
Why isn’t my crust crispy? Three likely culprits: chicken not dry, pan not hot enough, or cheese too thickly applied. Aim for an even, thin layer—like a fragile mosaic.
What wine pairs well with this? A crisp, mineral white like Vermentino or Sauvignon Blanc. If you prefer red, try a light Pinot Noir.
Can I make this ahead? Prep the chicken and coating up to 24 hours ahead, but add the topping right before cooking to preserve crunch.
10. Conclusion
This crispy lemon pecorino chicken is more than a weeknight dish—it’s a mood booster, a flavor journey, and proof you don’t need fancy technique to create something unforgettable. Bright, savory, and satisfying, it’s the kind of meal that makes everyone ask for seconds. For more zesty inspirations, check out my Lemon Blueberry Loaf or Strawberry Cream Cheese Muffins for dessert. Now go grab that pan—crisp chicken awaits. 🍋🍗 Print

Crispy Lemon Pecorino Chicken
Crispy lemon Pecorino chicken is a flavorful, high-protein chicken dish featuring zesty lemon, sharp Pecorino, and crunchy panko-pecan crust—ready in under 30 minutes.
- Total Time: 25 minutes
- Yield: 2 servings 1x
Ingredients
- 2 boneless, skinless chicken breasts
- 1/2 cup panko breadcrumbs
- 1/3 cup grated Pecorino Romano cheese
- 1/4 cup grated Parmesan cheese
- 1 tbsp lemon zest
- 1 tsp garlic powder
- 1 tsp dried oregano
- 1/2 tsp salt
- 1/4 tsp black pepper
- 2 tbsp all-purpose flour
- 2 large eggs, beaten
- 3 tbsp olive oil
- 1 tbsp fresh lemon juice
- 2 tbsp chopped fresh parsley
- 1/4 cup chopped toasted pecans (optional)
- 2 lemon wedges, for garnish
Instructions
- pound chicken breasts to 1/2-inch thickness and season lightly with salt and pepper.
- In a shallow bowl, mix panko, Pecorino, Parmesan, lemon zest, garlic powder, oregano, salt, and pepper.
- Place flour in another bowl, and beaten eggs in a third.
- Dredge each chicken piece in flour, then egg, then crumb mixture, pressing firmly to adhere.
- Heat olive oil in a large skillet over medium-high heat. Cook chicken for 3–4 minutes per side until golden and cooked through (internal temp 165°F).
- Remove chicken, let rest 2 minutes, then drizzle with lemon juice and sprinkle with parsley and pecans.
- Serve with lemon wedges and a side salad or roasted veggies.
Notes
- For extra crispiness, use twice-dredge method: egg-flour-egg-crumbs.
- Pecorino is salty—adjust added salt accordingly.
- Toast the pecans in a dry skillet for 3–4 minutes to deepen flavor.
- Gluten-free? Swap panko for gluten-free breadcrumbs and almond flour for all-purpose flour.
- Prep Time: 15 minutes
- Cook Time: 10 minutes
- Method: Pan-fry
- Cuisine: Italian-American
- Diet: High-Protein
Nutrition
- Serving Size: 1 breast
- Calories: 380 Kcal
- Sugar: 1 g
- Sodium: 580 mg
- Fat: 22 g
- Saturated Fat: 9 g
- Unsaturated Fat: 11 g
- Trans Fat: 0 g
- Carbohydrates: 18 g
- Fiber: 2 g
- Protein: 35 g
- Cholesterol: 110 mg
