
✨ Crispy Honey Butter Chicken: Glazed to Perfection in under 30 Minutes! ✨
1. Introduction
There’s nothing quite like the irresistible combo of crispy honey butter chicken sizzling on your plate—golden-brown, caramelized edges glistening with a rich, velvety glaze that sticks just right. This easy weeknight chicken dinner delivers maximum flavor with minimal effort: pan-seared to crispy perfection, then tossed in a luscious honey butter glaze chicken recipe that balances sweet, salty, and a hint of savory depth. It’s become a staple in our home for weeknights when we want something comforting yet elevate-ready—serve it over rice, with roasted veggies, or even in tacos! If you’ve tried our Sweet and Spicy Honey Pepper Chicken, you’ll appreciate how this version doubles down on texture and glaze richness while keeping things approachable.
2. Why You’ll Love This Recipe
- Ready in under 30 minutes—perfect for busy weeknights with zero last-minute stress.
- One-pan meal (with optional oven finishing)—less cleanup, more enjoyability.
- Restaurant-level flavor at home—crispy exterior with juicy, tender chicken inside.
- Versatile & family-friendly—goes with everything from mashed potatoes to steamed jasmine rice.
- Make-ahead friendly—marinate the chicken ahead or prep the glaze in advance.
3. Ingredient Notes
Quality here is everything—and it’s surprising how much better this dish tastes when you choose thoughtful swaps:
Chicken Thighs (Boneless, Skin-On): We prefer thighs over breasts here—they’re more forgiving, stay juicy during searing, and the skin crisps beautifully. Look for skin-on, boneless thighs for maximum crisp-to-meat ratio. If you can find organic, air-chilled chicken, that’s a bonus for cleaner flavor.
Unsalted Butter: Use European-style cultured butter (like Plugrá or Kerrygold) for a deeper, nuttier richness in the glaze. The culturing adds complexity that standard butter lacks.
Real Raw Honey: Avoid “honey blends” loaded with corn syrup. A light, floral honey (like orange blossom or clover) complements the savory notes without overpowering. For a deeper caramel note, try a dark amber honey.
Soy Sauce (or Tamari for GF): Low-sodium is best here—you’ll need control over the salt level. We use Kikkoman or San-J tamari for gluten-free versions without compromising umami.
Garlic & Ginger: Fresh is non-negotiable. Mince garlic finely (or use a microplane for ginger) for even distribution and to avoid bitter, burnt bits. Pre-minced? Just don’t—it lacks the bright, aromatic punch.
Cornstarch & Baking Powder: This powerhouse duo creates magic. Cornstarch crisps like crazy; baking powder slightly raises the pH, helping the skin brown faster and crisp more deeply—no bland, rubbery results.
4. Kitchen Tools You Need
You don’t need fancy gadgets to make crispy honey butter chicken shine—but the right tools make the difference between “good” and “iconic.”
For air fryer lovers, our top pick is the Compact 6-in-1 Digital Air Fryer by Amazon Basics. It’s surprisingly powerful for its size, heats evenly, and crisps chicken skin almost as well as a skillet—especially if you finish it with a quick broil. If you want even more versatility, the Ninja Foodi Smart XL indoor Grill & Air Fryer Combo lets you sear, air fry, roast, and dehydrate—all in one compact unit. Plus, its pressure cooking function can par-cook chicken thighs faster for next-day prep.
For the ultimate stovetop success, you’ll want a heavy-bottomed pan. The T-fal 14-Piece Hard Anodized Nonstick Cookware Set includes a perfect 12-inch skillet—thick, warping-resistant, and truly nonstick, even at high heat. That’s critical for getting that golden crust without sticking.
Need more prep power? Our full recipe calls for quick slicing, mincing, and whisking. Keep everything flowing with the Fullstar Ultimate Veggie Prep Master, which includes a sharp mandoline, garlic roaster, herb stripper, and more—especially helpful when prepping ginger, garlic, and green onions for garnish.
Pro tip: Store your finished glaze separately in an airtight container like the JoyJolt Airtight Glass Food Storage Set to preserve flavor and avoid odor transfer—glass won’t stain with tomato- or turmeric-based glazes either.
5. How to Make Crispy Honey Butter Chicken
Let’s break this down into three easy phases: Prep, Sear, and Glaze.
Phase 1: Prep & Dry Brine (10 minutes)
Start by trimming excess fat from chicken thighs—but leave the skin intact! Score the skin in a crosshatch pattern (½-inch deep) to help it crisp, and pat *extremely* dry with paper towels—any moisture ruins crispness.
In a small bowl, whisk 1 tbsp cornstarch, ¼ tsp baking powder, 1 tsp salt, and ½ tsp black pepper. Rub this mix *under* and *over* the skin—it’s the secret to restaurant-style texture. Place thighs skin-side up on a wire rack over a baking sheet and refrigerate, uncovered, for at least 20 minutes (or up to 4 hours). This dries the skin further for maximum crunch.
Phase 2: Sear to Golden Perfection (8–10 minutes)
Heat 2 tbsp neutral oil (like avocado or grapeseed) in a large skillet over medium-high heat until it shimmers. Place chicken skin-side down (use tongs—don’t crowd the pan!). Press gently with a spatula for 6–7 minutes, or until deeply golden and crisp. Flip and cook 3–4 minutes more until internal temp reaches 160°F (it’ll rise to 165°F off-heat). Transfer to a plate.
Visual cue: The skin should look leathery-crisp, not pale or flaccid. If it’s brown but not crispy, slide it back skin-down for 1 more minute.
Phase 3: Whisk & Glaze (5 minutes)
In the same pan (no cleaning needed—those browned bits = FLAVOR!), reduce heat to medium. Add 3 tbsp butter, 2 tbsp soy sauce, 2 tbsp honey, 1 tsp grated ginger, and 2 minced garlic cloves. Stir constantly until melted (30 seconds), then add 1 tbsp cornstarch slurry (1 tsp cornstarch + 1 tbsp cold water). Cook 1–2 minutes, whisking, until thickened and glossy.
Return chicken to the pan, skin-side up, and spoon glaze over generously. Let sit 1 minute—then serve immediately!
6. Expert Tips for Success
- Dry skin is sacred: Skipping the fridge-dry step is the #1 reason skin turns chewy. Don’t rush it.
- Don’t crowd the pan: Give thighs 1 inch of space. Steaming = soggy skin.
- Use a wire rack: If you have an air fryer, finish the crispy chicken there at 400°F for 2–3 minutes after glazing—heat circulates evenly for extra crunch.
- Glaze consistency tip: If your glaze thickens too fast, add a splash of water or broth. If too thin, whisk in a *tiny* more cornstarch slurry—1 teaspoon at a time.
- Acidity balance: Add a squeeze of lemon or rice vinegar at the end if the glaze feels *too* sweet. A pinch of red pepper flakes can add subtle heat without overwhelming.
7. Variations & Substitutions
- Spicy Version: Add 1 tsp gochujang or sriracha to the glaze—great if you love our Sweet and Spicy Honey Pepper Chicken.
- Sugar-Free: Use monk fruit sweetener + 1 tbsp apple cider vinegar for tang without sugar.
- Slow Cooker Option: Sear thighs first, then add all glaze ingredients to the slow cooker. Cook on LOW 3–4 hours. Final 5 minutes under the broiler for crisp skin.
- Gluten-Free: Swap soy sauce for tamari or coconut aminos.
- Extra Protein: Toss in roasted cashews or sesame seeds at the end for crunch and nutrition.
8. Storage & Reheating
Refrigerator: Store separate glaze and chicken in airtight containers (we love JoyJolt glass sets) for up to 4 days.
Reheating: **Avoid the microwave**—it ruins crispness. Instead, reheat chicken skin-side up in a 350°F oven or air fryer for 5–7 minutes. Reheat glaze in a small saucepan, whisking until smooth, then drizzle over reheated chicken.
Freezing: Freeze cooked, unglazed chicken (without skin crisping fully). Thaw, then crisp and glaze fresh—texture holds up well!
9. FAQ
Can I use chicken breast instead of thighs? Yes—but it’s riskier. Pound breasts to even thickness, score, and dry-brine. Sear 4–5 mins per side (not longer!) and use a thermometer to avoid dryness. Thighs are just more forgiving.
Why is my honey butter glaze runny? Either the cornstarch wasn’t fully cooked (it needs 1–2 minutes of bubbling) or too much liquid (honey/butter) was added too early. Whisk cold water into cornstarch *first*, then add slowly to the hot glaze.
How do I make this gluten-free? Use gluten-free tamari or coconut aminos instead of soy sauce—and double-check honey is certified GF (some are processed with barley).
Can I bake this instead of pan-sear? Absolutely. 400°F for 25–30 minutes (skin up), broil 2–3 minutes at the end for color. Baking gives a leaner result than pan-searing—but pan-searing delivers the best crisp-to-moisture ratio.
10. Conclusion
Crispy honey butter chicken is the kind of dish that transforms an ordinary weeknight into something special—no fancy skills required. That golden crust, the glossy, sticky-sweet glaze clinging to tender chicken? It’s pure comfort on a plate. Whether you’re making it for the family dinner, meal prepping lunches, or serving it up as a crowd-pleasing appetizer (try it in small sliders!), this recipe delivers every time. Pair it with something hearty like our Dump-and-Go Smothered Pork Chops for a double-down of comfort—or wrap it in warm tortillas with pickled vegetables for a quick taco night. Happy cooking—and hello, dinner done deliciously! 🍯🍗
Print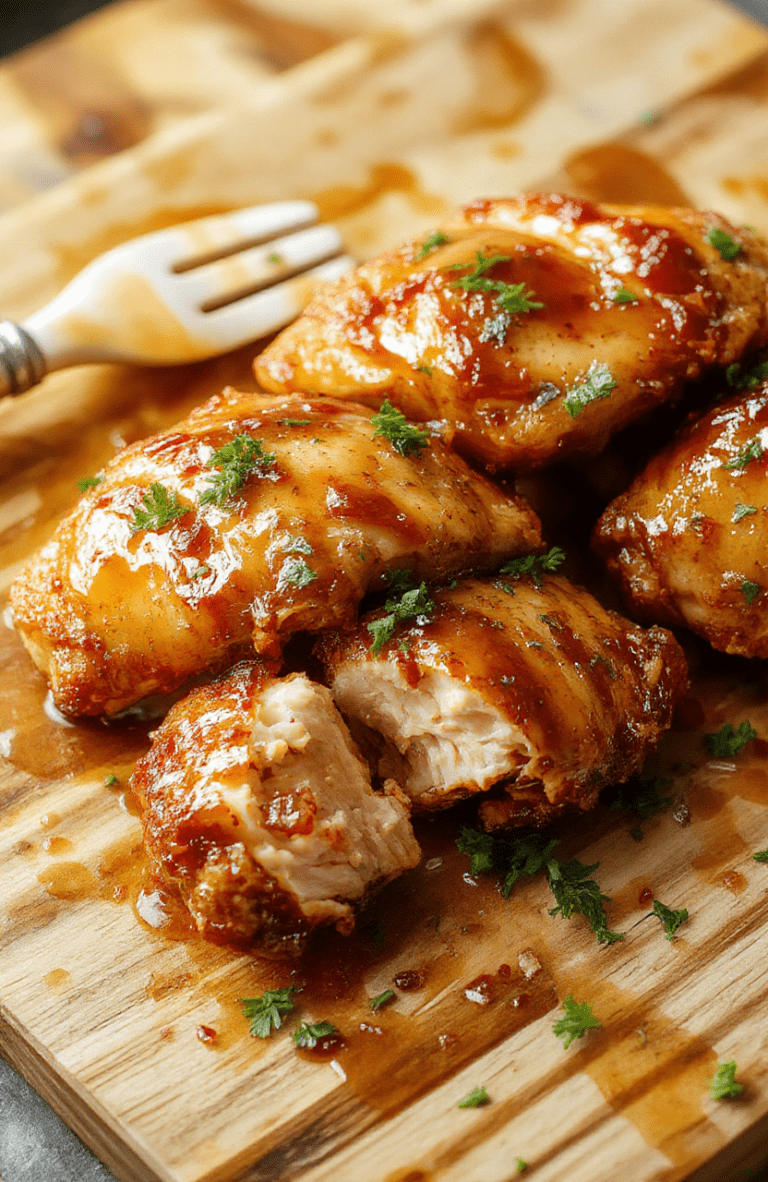
Crispy Honey Butter Chicken
Quick, crispy, and undeniably delicious — this honey butter chicken features blistered chicken thighs with a golden crust, slathered in a sticky-sweet honey butter glaze with a hint of garlic and ginger.
- Total Time: 25 minutes
- Yield: 4 servings 1x
Ingredients
- 1.5 lbs boneless, skinless chicken thighs, cut into bite-sized pieces
- 1/2 cup all-purpose flour
- 1/2 tsp salt
- 1/4 tsp black pepper
- 2 tbsp vegetable oil
- 3 tbsp unsalted butter
- 2 tbsp honey
- 1 tbsp soy sauce
- 1 tsp garlic powder
- 1/2 tsp ginger powder
- Sesame seeds and sliced green onions, for garnish
Instructions
- Toss chicken pieces with flour, salt, and pepper.
- Heat oil in a large skillet over medium-high heat; fry chicken until golden and cooked through, about 5–6 minutes.
- Reduce heat to low; add butter, honey, soy sauce, garlic powder, and ginger. Stir until melted and smooth.
- Add cooked chicken back to the skillet and toss to coat thoroughly in the glaze.
- Garnish with sesame seeds and green onions before serving.
Notes
- For extra crispiness, double-dredge the chicken: dip in flour, shake off excess, dip again.
- Use light or dark soy sauce based on preference — light is saltier, dark is richer.
- Prep Time: 10 minutes
- Cook Time: 15 minutes
- Method: Pan-frying
- Cuisine: Asian-inspired American
- Diet: None specified
Nutrition
- Serving Size: 1 serving
- Calories: 420 Kcal
- Sugar: 14g
- Sodium: 680mg
- Fat: 18g
- Saturated Fat: 7g
- Unsaturated Fat: 9g
- Trans Fat: 0g
- Carbohydrates: 38g
- Fiber: 1g
- Protein: 26g
- Cholesterol: 85mg
