
🌟🥒 Crispy & Crunchy Homemade Dill Pickles for Canning: The Ultimate Guide to Perfectly Crispy Dill Pickles 🥒🌟
1. Introduction
There’s nothing quite like the satisfaction of making your own homemade dill pickles. Whether you’re a seasoned canner or a beginner looking to preserve the bounty of your garden, creating canning dill pickles offers a delicious, tangy crunch that lasts all year. This crispy pickles recipe combines simple ingredients with a foolproof method to ensure each jar is bursting with flavor and unforgettable texture. Read on to discover how to craft these crispy and crunchy homemade dill pickles for canning, and turn fresh cucumbers into a delightful snack or condiment.
2. Ingredients for Crispy & Crunchy Homemade Dill Pickles
- 4 pounds fresh cucumbers (preferably pickling cucumbers)
- 4 cups water
- 2 cups white vinegar (5% acidity)
- 1/4 cup kosher salt or pickling salt
- 4 garlic cloves, peeled
- 4-6 fresh dill sprigs
- 1 teaspoon pickling spice (optional)
- 1 teaspoon crushed red pepper flakes (optional for a spicy kick)
- Fresh peppercorns (for flavor)
- Additional jars and lids for canning
3. How to Make Crispy & Crunchy Homemade Dill Pickles
Preparation of cucumbers
Begin by thoroughly washing the cucumbers. For that extra crunch, consider slicing them into spears or keeping them whole with a small hole punched in each. Packing density is key to achieving those crispy results, so don’t overcrowd the jars.
Preparing the pickling brine
In a pot, combine water, vinegar, and salt. Bring to a boil, stirring until the salt dissolves completely. The hot brine helps preserve the cucumbers and enhances flavor. Learn more about flavorful preservation techniques.
Assembling the jars
Place garlic cloves, dill sprigs, peppercorns, and pickling spice into each sterilized jar. Pack the cucumbers tightly into the jars without crushing. Pour the hot brine over the cucumbers, leaving about ½ inch headspace.
Sealing and processing
Seal the jars with sterilized lids and bands. Process in a boiling water bath for about 10 minutes to ensure proper preservation. This step is crucial for canning dill pickles that last for months.
4. Storage Tips for Long-Lasting Crispy Pickles
Store your homemade dill pickles in a cool, dark place like a pantry or cellar. For optimal crunchiness, avoid storing in the refrigerator immediately. Once opened, keep refrigerated and consume within a month for best texture and flavor.
5. Serving Suggestions for Your Canning Dill Pickles
These crispy pickles are perfect as a snack, on sandwiches, or as a zesty side dish alongside some of your favorite recipes like Southern fried chicken or juicy grilled meats. Their crunch and tang complement cheese boards, burgers, and salads beautifully.
6. FAQs about Homemade Dill Pickles
Can I use pickling cucumbers for this recipe?
Absolutely! Using fresh pickling cucumbers ensures the best crunchiness and flavor. Regular slicing cucumbers can work, but pickling varieties tend to give the most consistent results.
Can I make these pickles without canning?
Yes, you can make refrigerator pickles by skipping the processing step. Store them in the fridge and enjoy within a month. Canning extends shelf life and preserves the crispness for longer.
How long do homemade dill pickles last?
When properly canned and stored, these pickles will last up to a year in a cool, dark pantry. Once opened, consume within one month for optimal freshness.
Can I adjust the spices?
Feel free to customize with additional spices like mustard seeds, coriander, or red pepper flakes to suit your taste preferences.
7. Additional Resources & Recipes
If you love preserving food at home, check out our kid-friendly hidden veggie muffins for fun snack ideas or explore the Harry Potter cookbook for themed culinary adventures that complement your homemade preserves.
8. Kitchen Tools that You Might Need for This Recipe
- Canning Jar Kit – Ensures your jars seal perfectly and helps keep your pickles fresh longer, making the curation process seamless.
- Foley Food Mill – Ideal for crushing cucumbers and preparing your brine with ease, boosting the texture consistency.
- Canning Pot with Rack – Provides an even and safe method to process your jars, ensuring your homemade dill pickles last through the seasons.
- Glass Measuring Cups – Precise measurement of your ingredients guarantees perfect flavor balance in every batch.
Investing in quality tools elevates the entire canning experience, resulting in perfect canning dill pickles every time!
9. Conclusion
Mastering the art of homemade dill pickles is both rewarding and delicious. With a simple recipe and basic canning skills, you can enjoy crispy and crunchy pickles whenever you desire. Whether preserved for gifts, family gatherings, or personal indulgence, these canning dill pickles will surely become a staple. Enjoy the process, be patient, and savor the tangy crunch of your own preserved harvest!
Print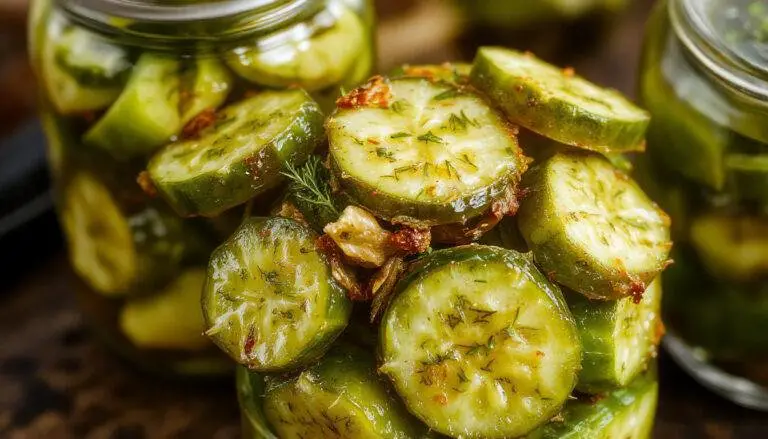
Crispy & Crunchy Homemade Dill Pickles for Canning
Discover how to make crispy and crunchy homemade dill pickles for canning with this easy step-by-step guide. Perfect for preserving your garden cucumbers, these homemade dill pickles are tangy, flavorful, and satisfyingly crunchy, making them ideal for gifting, snacking, and enhancing your favorite dishes all year round.
- Total Time: 30 minutes + cooling and processing time
- Yield: about 4 quarts 1x
Ingredients
- 4 pounds fresh cucumbers (preferably pickling cucumbers)
- 4 cups water
- 2 cups white vinegar (5% acidity)
- 1/4 cup kosher salt or pickling salt
- 4 garlic cloves, peeled
- 4–6 fresh dill sprigs
- 1 teaspoon pickling spice (optional)
- 1 teaspoon crushed red pepper flakes (optional for spice)
- Fresh peppercorns (for flavor)
- Additional jars and lids for canning
Instructions
- Begin by thoroughly washing the cucumbers. Slice into spears or keep whole with a small hole punched in each for extra crunch. Pack jars tightly without crushing.
- In a pot, combine water, vinegar, and salt. Bring to a boil, stirring until salt dissolves completely to create the pickling brine.
- Place garlic cloves, dill sprigs, peppercorns, and pickling spice into each sterilized jar. Pack cucumbers into jars, then pour hot brine over them, leaving about ½ inch headspace.
- Seal the jars with sterilized lids and bands. Process in a boiling water bath for approximately 10 minutes to ensure proper preservation and long shelf life.
Notes
- Use fresh, firm cucumbers for the best crunch and flavor.
- Adjust spice levels to taste by adding mustard seeds, coriander, or extra red pepper flakes.
- Proper sterilization and processing are essential for safe home canning and optimal shelf life.
- Store canned pickles in a cool, dark pantry. Once opened, refrigerate and consume within a month for best texture and flavor.
- Prep Time: 20 minutes
- Cook Time: 10 minutes
- Category: Appetizer, Snack, Condiment
- Method: Canning, Pickling
- Cuisine: American, Homemade
- Diet: Vegan, Vegetarian
Nutrition
- Serving Size: 1 jar (about 1 cup)
- Calories: 15 Kcal
- Sugar: 1g
- Sodium: 300mg
- Fat: 0g
- Saturated Fat: 0g
- Unsaturated Fat: 0g
- Trans Fat: 0g
- Carbohydrates: 3g
- Fiber: 1g
- Protein: 0g
- Cholesterol: 0mg
