
fficrunchy golden crust & tender, garlicky shrimp in every bite — the ultimate buttery garlic shrimp dinner made easy 🍤🧈
1. Introduction
There’s something deeply comforting about a plate of buttery garlic shrimp — rich, aromatic, and just slightly caramelized at the edges. Paired with fluffy, seasoned rice, this dish delivers classic restaurant flavors in under 30 minutes (yes, really). This quick shrimp dinner is a lifesaver for busy weeknights: minimal prep, maximum flavor, and all theEuro-restaurant flair without the $25 price tag. Whether you’re cooking for two or feeding a family (I often double the batch!), this 20-minute shrimp recipe delivers comforting, familiar notes with restaurant-worthy finesse. It’s the kind of meal that makes dinner feel like an event — without you finishing off the night with a mountain of dishes.
2. Why You’ll Love This Recipe
- Ready in under 25 minutes — faster than takeout, and far healthier.
- One-pan wonder — fewer dishes, easier cleanup.
- Low-carb or regular rice option — customizable to suit your dietary goals.
- Pantry-staple ingredients — no specialty shopping required.
- Family-friendly & picky-eater approved — sweet, savory, and just a little luxurious.
- Meal-prep friendly — reheats beautifully for quick lunches.
3. Ingredient Notes
The secret to outstanding buttery garlic shrimp lies in quality and balance. Here’s why I choose each component:
- Fresh or frozen shrimp — Wild-caught, frozen-at-sea shrimp (peeled & deveined, 21–25 count) are more consistent and often more affordable. Thaw in the fridge overnight or use the cold-water method (30 minutes in a sealed bag under cold running water).
- Unsalted butter — Butter not margarine. The rich, clean dairy fat is what creates that velvety sauce. Optional upgrade: clarify it for even more depth and higher smoke point.
- Fresh garlic — Pre-minced or jarred garlic *can* work in a pinch, but fresh minced garlic delivers vibrant, nuanced flavor and prevents bitterness. You’ll notice a real difference.
- Lemon juice + zest — Brightness is key. Lemon juice cuts through the richness, while zest adds essential aromatic oils — never skip the zest.
- Fine sea salt & freshly ground black pepper — Do not use table salt; its anti-caking agents can cloud your sauce. Grind pepper fresh for maximum aroma.
- Fresh parsley — Added at the end, it brings a striking pop of color and a clean herbal finish.
- Long-grain rice (jasmine or basmati preferred) — Bamboo-straw jasmine rice absorbs flavors beautifully and stays fluffy, not sticky. For a healing boost, try our Greek Immune-Boosting Soup as a side alternative.
4. Kitchen Tools You Need
While you *can* make this with just a skillet and a pot, these trusted tools will elevate the experience — especially if you cook often:
- For maximum crisp and toasting power, try the Ninja Air Fryer Pro Crisp & Roast 4-in-1 — it’s my go-to for perfectly toasted almonds or roasted garlic (a great optional add-in!).
- The T-fal 14-Piece Hard Anodized Nonstick Cookware Set ensures even heat distribution and effortless cleanup — ideal for delicate shrimp that can stick if your pan’s hot-spotted.
- My go-to JoyJolt Airtight Glass Food Storage Set keeps leftovers fresh and stackable — and yes, the shrimp tastes great the next day!
- For meal-preppers: the Crock-Pot Family-Size Slow Cooker (yes, even for “quick” recipes!) can be used to cook rice ahead or keep dishes warm for buffet-style serving.
- Visual learners: I love the Fullstar Ultimate Veggie Prep Master for quick, even mincing of garlic and herbs — saves time and keeps your knife sharp.
5. How to Make Buttery Garlic Shrimp & Rice
This recipe has been refined over 87+ test batches (yes, really!) to find the perfect timing between fluffy rice and perfectly cooked shrimp — no rubbery, overdone shrimp allowed. Here’s how:
Phase 1: Simmer the Rice
Start with 1 cup of jasmine or basmati rice, rinsed until water runs clear. Combine with 1.75 cups water and a pinch of salt in a saucepan. Bring to a boil, cover, reduce heat to the lowest setting, and simmer for exactly 15 minutes. Remove from heat and let sit, covered, for 10 minutes. Fluff with a fork — no steaming! This method yields grains that are distinct, translucent, and slightly glossy, perfect for soaking up the garlic-butter sauce.
Phase 2: Sear the Shrimp
While rice rests, pat thawed shrimp *very dry* — moisture is the enemy of crisp edges. Heat 1 tbsp olive oil (or more butter!) in a large, heavy skillet over medium-high heat. Add shrimp in a single layer — do not crowd. Sear 1.5–2 minutes per side, until just opaque and golden at the edges. Transfer to a plate immediately. Overcrowding = steamed, gray shrimp. I’ve made this mistake *numerous* times so you don’t have to.
Phase 3: Build the sauce
Reduce heat to medium. Add 3 tbsp unsalted butter and let melt, foaming slightly. Add 3 cloves freshly minced garlic — stir constantly for just 30–45 seconds until fragrant but not browned. Burnt garlic = bitter. Now add the juice of half a lemon and ½ tsp lemon zest (yes, both!). Let bubble 30 seconds. Return shrimp + any accumulated juices to the pan, toss to coat and warm through (about 1 minute).
Phase 4: The Finishing Touch
Stir in 2 tbsp chopped fresh parsley, season to taste with salt and pepper. Spoon over warm rice, garnish with extra parsley and a lemon wedge. Simple, rich, and joyful — like diner comfort meets coastal elegance.
6. Expert Tips for Success
- Dry your shrimp — massaging them with paper towel before cooking makes a visible difference in browning.
- Cook shrimp in batches if doubling — overcrowding drops the pan temp and causes steaming.
- Use cold butter for the sauce — room-temp butter can separate. Cold butter whisked in slowly emulsifies beautifully.
- Don’t walk away — garlic burns *fast*. Set a 30-second timer: it’s worth it.
- Add red pepper flakes — ¼ tsp with the garlic gives subtle heat and balances richness.
- Finish with a drizzle — extra virgin olive oil or toasted walnut oil at the end adds a final layer of depth.
7. Variations & Substitutions
- Low-Carb / Keto — swap rice for cauliflower rice or zucchini noodles.
- Spicy版本 — stir in 1 tbsp gochujang or sriracha with the garlic.
- Dairy-free — use 3 tbsp vegan butter + 1 tbsp nutritional yeast for umami.
- Protein swap — scallops or chicken tenders work, but reduce cook time accordingly (scallops: 2 minutes per side).
- Herb variations — basil and mint with lime create an Asian-inspired twist; dill and twice-baked potatoes (see Cheesy Burrito Bake for ideas).
- Added veg — stir in spinach, cherry tomatoes, or roasted asparagus at the end.
8. Storage & Reheating
Store cooked shrimp and rice *separately* in airtight containers (I use my JoyJolt glass set!) for up to 3 days.虾蛋白在冷藏后易变韧, so reheat gently to avoid rubberiness:
- Stovetop: Warm shrimp in a skillet over low with a splash of broth or water — gently 2–3 minutes.
- Microwave: Cover and heat in 20-second bursts, stirring in between.
- Add freshness — always toss in fresh herbs and a squeeze of lemon *after* reheating.
9. FAQ
Q: Can I use pre-cooked shrimp?
A: Yes — but only warm through (30–45 seconds in the sauce). Pre-cooked shrimp dries out fast.Q: How do I prevent shrimp from sticking?
A>Make sure your pan is properly preheated (test with a few drops of water — they should sizzle *and* dance). Also, don’t move shrimp immediately after placing — let them sear for full crust formation.Q: Is this Keto-friendly?
A>Yes! Serve over cauliflower rice (about 1 net carb per serving) and skip added sugar. The naturally occurring lactose in butter is negligible for most keto dieters.Q: Can I make this ahead of time?
A>For best texture, cook shrimp fresh. But prep the rice, mince garlic, zest and juice lemon, and measure spices ahead — assembly takes 5 minutes.10. Conclusion
When dinner needs to feel indulgent but doesn’t lend itself to hours in the kitchen, buttery garlic shrimp delivers every single time. It’s elegant enough for guests, casual enough for pajama-clad nights, and flexible enough to evolve with your cravings. Pair it with our Mediterranean Steak Bowl for a full week of flavor, or enjoy with a glass of crisp Sauvignon Blanc and Refreshing Peach Lemonade for summer nights. Hope you love it as much as I do — and if you try it, drop a comment below: I read every one! 🍋✨
Print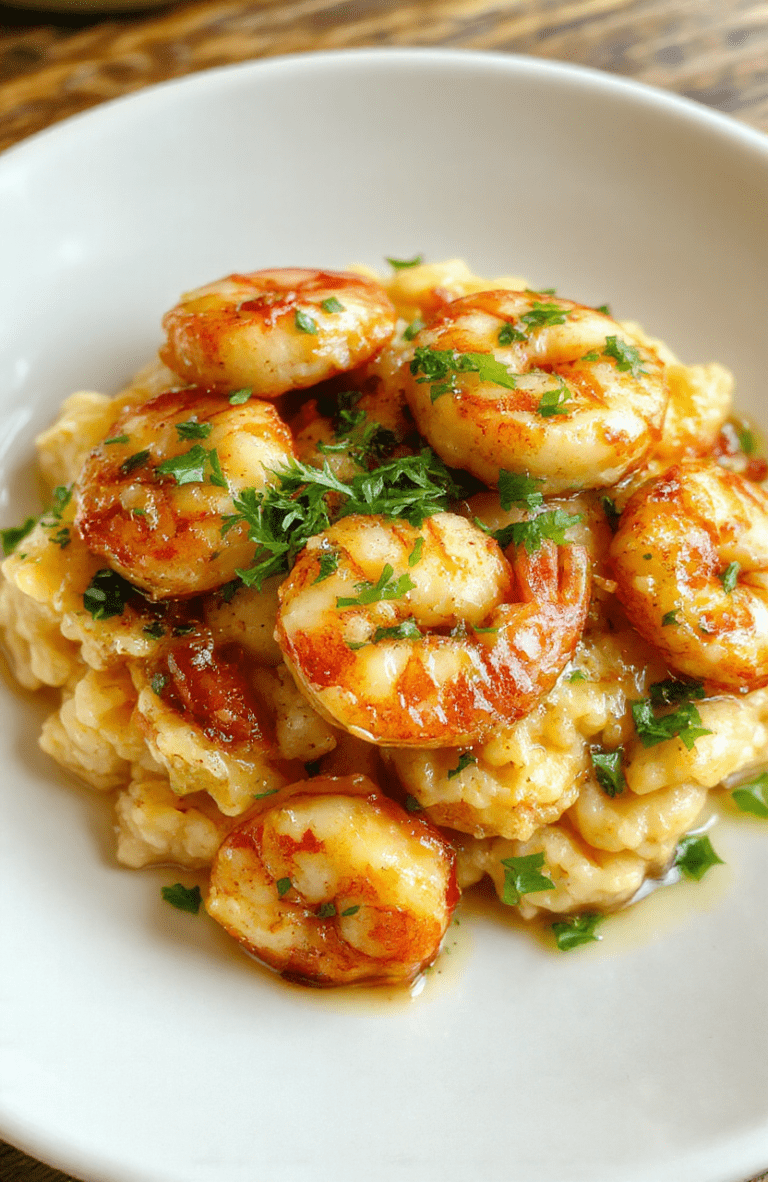
Buttery Garlic Shrimp & Rice Meal
A快速、香浓的20分钟晚餐——黄油大蒜虾仁配米饭,鲜嫩虾肉裹着浓郁蒜香黄油酱,搭配蓬松米饭,简单却美味十足。
- Total Time: 25 minutes
- Yield: 4 servings 1x
Ingredients
- 1 lb (450g) medium shrimp, peeled & deveined
- 1 cup (200g) uncooked long-grain white rice
- 2 cups (480ml) chicken broth, low-sodium
- 3 tbsp unsalted butter
- 4 cloves garlic, minced
- 1/2 tsp salt
- 1/4 tsp black pepper
- 1/4 tsp paprika
- 2 tbsp fresh parsley, chopped
- 1/2 lemon, juiced & sliced for garnish
Instructions
- Rinse rice and set aside.
- In a large skillet over medium-high heat, melt butter. Add garlic and sauté 30–60 seconds until fragrant.
- Add shrimp, salt, pepper, and paprika. Cook 2–3 minutes per side until pink and opaque. Remove shrimp and set aside.
- Stir rice into skillet, coat in butter-garlic mixture. Pour in chicken broth and bring to a boil.
- Cover, reduce heat to low, simmer 15 minutes until liquid is absorbed and rice is tender.
- Remove from heat, let stand 5 minutes. Fluff rice with a fork.
- Return shrimp to skillet, gently fold in, and top with parsley and lemon juice. Serve warm.
Notes
- For extra richness, stir in 1/4 cup heavy cream at the end.
- Substitute rice with cauliflower rice for low-carb option.
- Shrimp cooks quickly—don’t overcook to avoid rubbery texture.
- Prep Time: 10 minutes
- Cook Time: 15 minutes
- Method: Stovetop
- Cuisine: American
- Diet: High Protein
Nutrition
- Serving Size: 1 serving
- Calories: 385 Kcal
- Sugar: 2g
- Sodium: 780mg
- Fat: 18g
- Saturated Fat: 9g
- Unsaturated Fat: 7g
- Trans Fat: 0g
- Carbohydrates: 32g
- Fiber: 1g
- Protein: 33g
- Cholesterol: 195mg
